

Last updated September 28, 2026
Before you start: tools to lay out
A clean, organized station is half the job. Gather everything before you touch adhesive so you are not hunting for a tool with tacky fingers. This is the same kit we set up at the studio for a fresh attachment.
- Your cleaned hair system, brushed out and ready
- Scalp cleanser or rubbing alcohol and cotton pads to strip old residue and oil
- A skin prep or scalp protector wipe if your skin runs oily or sensitive
- Your adhesive: double sided tape strips cut to shape, or liquid or soft bond glue with a small applicator brush
- A rat tail comb or eyeliner style pencil to mark your hairline
- A blow dryer set to cool or low for flashing glue to tack
- A hand mirror plus a wall mirror so you can see front and back
- A hard rubber roller or firm cloth to press the bond down
Step by step: attaching the unit
Work in this order every time. The two moves people rush are drying the scalp fully and waiting for the adhesive to tack, and those are the two that decide whether the bond holds all week.
- 1. Clean the scalp. Wipe the entire bonding area with cleanser or alcohol to remove oil, sweat, and any old adhesive. Skin that still feels tacky or slick will not hold a fresh bond.
- 2. Dry completely. Let the area air dry or use a cool dryer. Any moisture trapped under the base weakens the grip and shortens how long the attachment lasts.
- 3. Prep the skin if needed. If you run oily or sweat heavily, wipe on a thin layer of scalp protector and let it dry. It gives the adhesive a cleaner surface to grab.
- 4. Mark your hairline. Use a comb tip or a light pencil dot at the center of your forehead so you place the front edge in the same spot every time. Consistency here is what keeps the look natural day to day.
- 5. Apply the adhesive. For tape, press strips around the perimeter and across the bonding zone of the base, then peel the top liners. For glue, brush a thin, even coat onto the scalp inside your marked area. Thin beats thick every time; a heavy coat oozes and takes far longer to cure.
- 6. Let it tack. This is the step to respect. Tape is ready once the liner is off. Glue needs to flash from wet and shiny to clingy and matte before the unit goes on, usually 3 to 10 minutes depending on the product and the room. A cool dryer speeds it along.
- 7. Set the front first. Line the front edge up to your hairline mark and lower the unit onto the scalp from front to back, smoothing as you go so you do not trap air or wrinkle the base.
- 8. Press the whole bond. Work from the center outward with firm pressure, then run a roller or firm cloth around the entire perimeter. The edges are where lifting starts, so give them the most attention.
- 9. Hold and wait. Keep pressure on for a minute or two, then leave the bond alone to cure before styling, washing, or sweating. Cure times are below.
Cure times: how long before you can wash or sweat
Setting the unit and curing the adhesive are two different things. The unit feels attached right away, but the bond has not reached full strength yet, and rushing it is the most common reason a fresh attachment lifts early. Treat these as general windows, since humidity, heat, and the specific adhesive all shift them, and always follow the instructions on your product.
- Initial set: the unit is on and holding within a minute or two of pressing the perimeter.
- Safe to style dry: most people can comb and style gently after the bond has held for 10 to 20 minutes.
- Full cure before water and sweat: give a liquid or soft bond glue several hours, and many men attach in the evening and let it cure overnight before the first shower or workout. Tape holds sooner but still benefits from a few hours before heavy water exposure.
- First wash: wait until the adhesive has fully cured before its first real soak, so you are not loosening a bond that never finished setting.
If it is not holding: quick fixes
Most attachment problems trace back to prep or timing, not the adhesive itself. If an edge lifts or the bond feels weak, here is what usually went wrong and how to correct it next time.
- Edge lifts at the front or temples: the perimeter was under pressed or the skin still had oil. Re clean, re prep, and roll the edges harder next attachment.
- Bond feels weak all over: the glue went on while the scalp was damp, or the unit was set before the adhesive tacked. Dry fully and wait for the matte tack next time.
- Adhesive oozes past the hairline: too thick a coat. Use a thinner, even layer and let it flash longer.
- Lifts within a day in heat: sweat and oil broke the bond early. Add a scalp protector, consider a stronger hold adhesive, and see our pages on why a unit lifts and on wearing a system in hot weather.
- Itch or irritation under the base: stop and reassess the adhesive or skin prep rather than pushing through. Persistent scalp irritation is a question for a physician, not something to fix with more product.
Self-apply or come to the studio
Plenty of men attach their own units at home once they have been shown the sequence a few times, and a clean self-apply routine is completely doable. It rewards patience with prep and tack times more than any special skill.
That said, the first attachment after a haircut or a new unit is where a professional install earns its keep. We cut in the hairline, dial in placement, and set the bond so you have a reference for what right feels like, then you can maintain it yourself between visits. If you are deciding between the two, or you want the exact products for your skin and climate, that is what the consultation is for. Nico, Ivette, and Denisse fit and teach this every week at our Peoria, AZ and Eighty Four, PA studios.
Real work
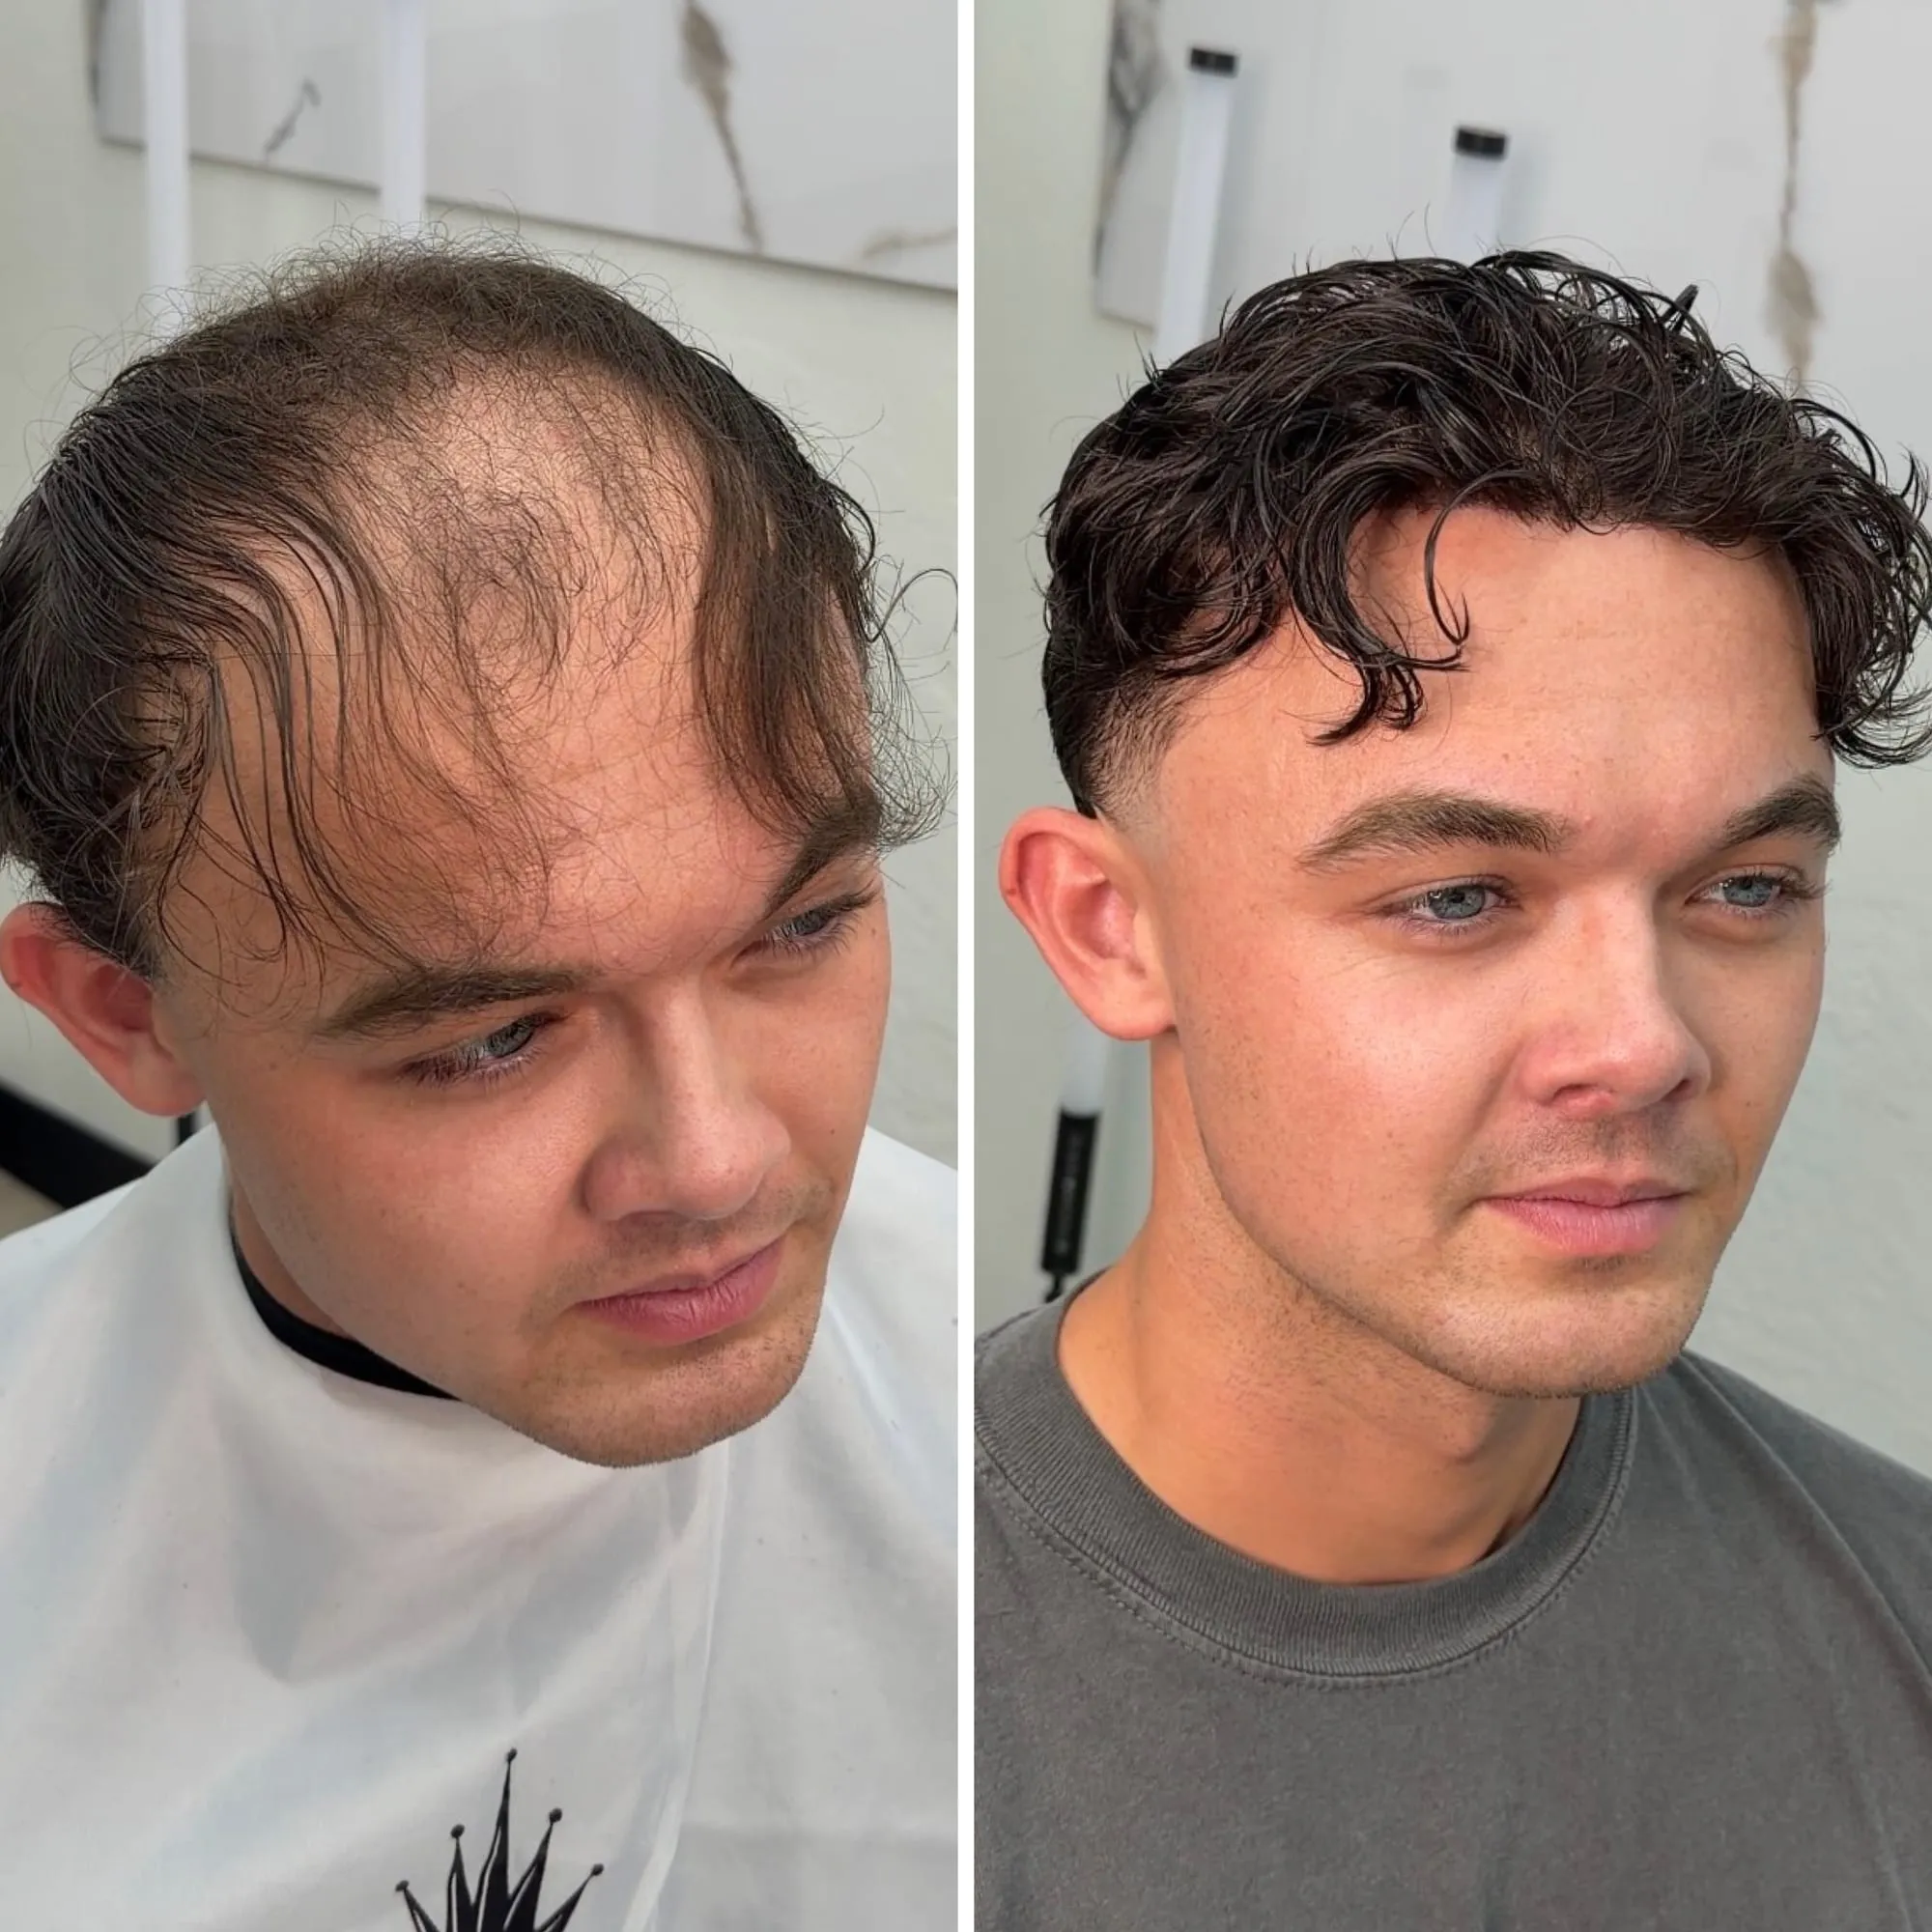
This is what it looks like.
A real client from our chair, photographed before and after his hair system was installed and cut in.
Questions, answered.
How long does it take to attach a hair system?
Most people need 20 to 45 minutes once they have practiced the routine. A first attempt takes longer because prep, marking the hairline, and waiting for the adhesive to tack all deserve their own time. The steps that feel slow are the ones that make the bond hold.
How long should adhesive cure before I shower?
Set time is a minute or two, but full cure is different. Liquid and soft bond glues do best with several hours, and many men attach in the evening and let it cure overnight before the first shower or workout. Tape holds sooner but still benefits from a few hours before heavy water. Follow your product's instructions.
Should I use tape or glue to attach my unit?
Both work. Tape is faster and cleaner to apply and remove, which suits men who reattach often. Liquid and soft bond glues can give a stronger, longer hold and a flatter front edge. Many attachments use both, tape around part of the perimeter and glue elsewhere. We match the method to your skin, activity, and how long you want each bond to last.
Why does my hair system keep lifting at the edges?
Edge lifting almost always comes from prep or pressure, not the adhesive. Oil or moisture left on the skin, setting the unit before the glue tacked, or under pressing the perimeter are the usual causes. Re clean the scalp, let it dry fully, wait for a matte tack, and roll the edges down firmly.
Can I attach a hair system by myself at home?
Yes. Many men self-apply once they have been shown the sequence, and the routine is more about patience than skill. The trickiest first step is cutting in and placing a brand new unit, which is worth doing in the chair once so you have a reference. After that, home reattachment is straightforward.
Keep reading
Related guides.
Attachment Methods
Tape, bonding, and clip attachment for hair systems compared by hold, comfort, and how they suit your routine. How to attach a hair system.
Tape vs Glue
Tape typically holds a hair system one to two weeks, liquid glue two to four weeks. How sweat, humidity, and base type decide which to use.
Removing a System
How to remove a hair system without damaging your hair: the right solvent, the technique, and why studio removal protects your scalp and the unit.
Why It Is Lifting
A hair system usually lifts because of scalp oil, sweat, humidity, a skipped clarifying wash, or the wrong adhesive. Here is the cause and the fix.