Last updated September 28, 2026
What a professional station kit actually is
A professional station kit is the full working setup a technician needs to complete any service without leaving the chair to hunt for a tool. It is a different animal from the compact care kit a wearer keeps at home, which only has to reattach and clean one unit the client already owns. Behind the chair you have to cut in raw stock, feather a perimeter, bond, remove, prep skin, template for a custom order, and reset a unit that has been worn, sometimes all in one appointment.
The cleanest way to think about it is by station zone rather than by a flat shopping list. Each zone is a job the service depends on, and each zone has a small set of items it cannot run without plus a few it grows into as your skill widens. Stock the zones, keep a backup of anything that would cancel a service if you ran out, and let the rest come in as the work demands it. That is how we set up the stations at our Peoria, AZ and Eighty Four, PA studios, and it is how Nico Rigano coaches newer technicians to build a kit that never strands them mid-appointment.
The station checklist, zone by zone
Here is the professional station mapped as a checklist. Read the last column as priority: must-have zones have to be stocked before you take your first paying client, and grow-into zones come online as you move from installing stock units into custom orders and in-chair repairs. No brands and no figures appear here on purpose, because the right product in each row is the one that behaves best on your clients in your climate, and that is a judgment you make at the trade table, not from a list.
| Station zone | Core tools and supplies | What the zone does | Priority |
|---|---|---|---|
| Bonding station | Soft-bond and hard-bond adhesives, a matched remover for each, small application brushes, alcohol prep pads, cotton and applicators | Attaches the unit for the client's wear needs and clears all residue cleanly at removal | Must-have |
| Cutting and blending station | Thinning and texturizing shears, fine detail scissors, a razor you trust for soft edges, wide and fine combs, sectioning clips, a handheld mirror | Cuts in the unit and feathers the perimeter into the client's growing hair for an undetectable transition | Must-have |
| Prep and sanitation station | Scalp cleanser and degreaser, skin-barrier product for sensitive clients, gloves, disinfectant, single-use applicators, clean towels | Gives the adhesive a clean, oil-free surface and keeps the station compliant with your state board | Must-have |
| Aftercare retail shelf | Sulfate-free cleanser, conditioner formulated for the base, a leave-in product, a printed take-home care sheet | Supports the wearer between visits and anchors the maintenance relationship that repeats | Must-have (light) |
| Templating and measurement station | Molding or template material, low-tack tape, a fine hairline marker, a flexible measuring tape, blank order forms | Captures the client's head shape and hairline accurately before a custom unit is ordered | Grow-into |
| Repair and re-ventilation station | Ventilating needles in a range of sizes, a needle holder, a holding clamp or block, task lighting and magnification | Handles in-chair knot repairs and small customizations instead of sending every unit out | Grow-into |
The bonding station: where the day is won or lost
This is the zone that drives comfort, wear time, and your callback rate, so it earns the most care when you build it. Carry a small range rather than one product forced onto every head. In practice that means a soft-bond option for shorter wear and easy removal, a hard-bond option for longer wear, heat, and sweat, and a remover matched to the chemistry of each. A humid summer, an active client, and a sensitive scalp each pull you toward a different answer, which is exactly why one adhesive never covers a full book.
Removers belong in this zone as equal partners to the bond, not as an afterthought. Keep both a citrus-based and an oil-based option so you are never fighting residue you cannot clear, and never let a client leave with product still on the scalp or base. Clean removal is what protects the client's own hair and skin and what earns the rebook. Stock skin-test supplies here too so you can test a new or sensitive client for a reaction before a full service.
Cutting, blending, prep, and sanitation
If you already cut hair you own most of the cutting zone, but system work asks more of your blending tools than a standard cut does. The natural result lives entirely in the perimeter where the unit meets growing hair, so keep a dedicated set of thinning shears, a razor for soft edges, and fine detail scissors reserved for that transition. A dedicated set stays sharp for the delicate work and does not get dulled on everyday cuts.
The prep and sanitation zone is quiet work that never shows up in a photo and is the fastest place to lose a bond if you skip it. Scalp cleansers and a degreaser give the adhesive a clean surface, a barrier product protects clients who need it, and gloves, disinfectant, single-use applicators, and clean towels keep you safe and compliant. Sanitation is often exactly what a state board inspects, so build it into your per-client setup from day one and never treat it as the corner you cut to save a few minutes.
Templating, repair, and the aftercare shelf
The templating and measurement zone comes online the moment you move from stock units into custom orders. Molding material, low-tack tape, a fine marker, and a measuring tape let you capture the client's exact head shape and hairline, and these supplies are inexpensive relative to the cost of a poorly fitted custom unit, so we never improvise here. The technique that turns those supplies into an accurate order is covered in our templating and measurement guide, and it is worth practicing on models before it goes on an order form.
The repair and re-ventilation zone is the last to arrive for most technicians. Ventilating needles, a holder, a holding clamp, and good task lighting let you re-knot small areas and make minor customizations in the chair rather than sending every unit back to the factory, which is a natural step as your hands get faster through reps and mentorship. Finally, the aftercare retail shelf is light but should exist from the start: a base-safe cleanser, a conditioner, a leave-in, and a printed care sheet turn a one-time install into the repeating maintenance relationship that is the real economic engine of the service.
How to phase the kit as you grow
Do not buy the whole station at once from a list you found online. Build it from the services you offer this quarter. If you are installing stock units, weight your spend toward adhesive range and blending tools and keep templating light. As custom orders and in-chair repairs enter your book, the grow-into zones climb the priority list and earn their space at the station.
Buy consumables in quantities you can cycle through before they degrade, because adhesives and prep solutions have a working shelf life and dead stock is wasted spend. Keep a backup only of the items that would cancel a service if you ran out, chiefly your primary adhesive and its remover. Test any new product on yourself or a model before a paying client, and keep notes on how each one holds and removes in your climate. That notebook becomes your real sourcing guide, and it outlasts any brand that reformulates or goes out of stock.
Real work
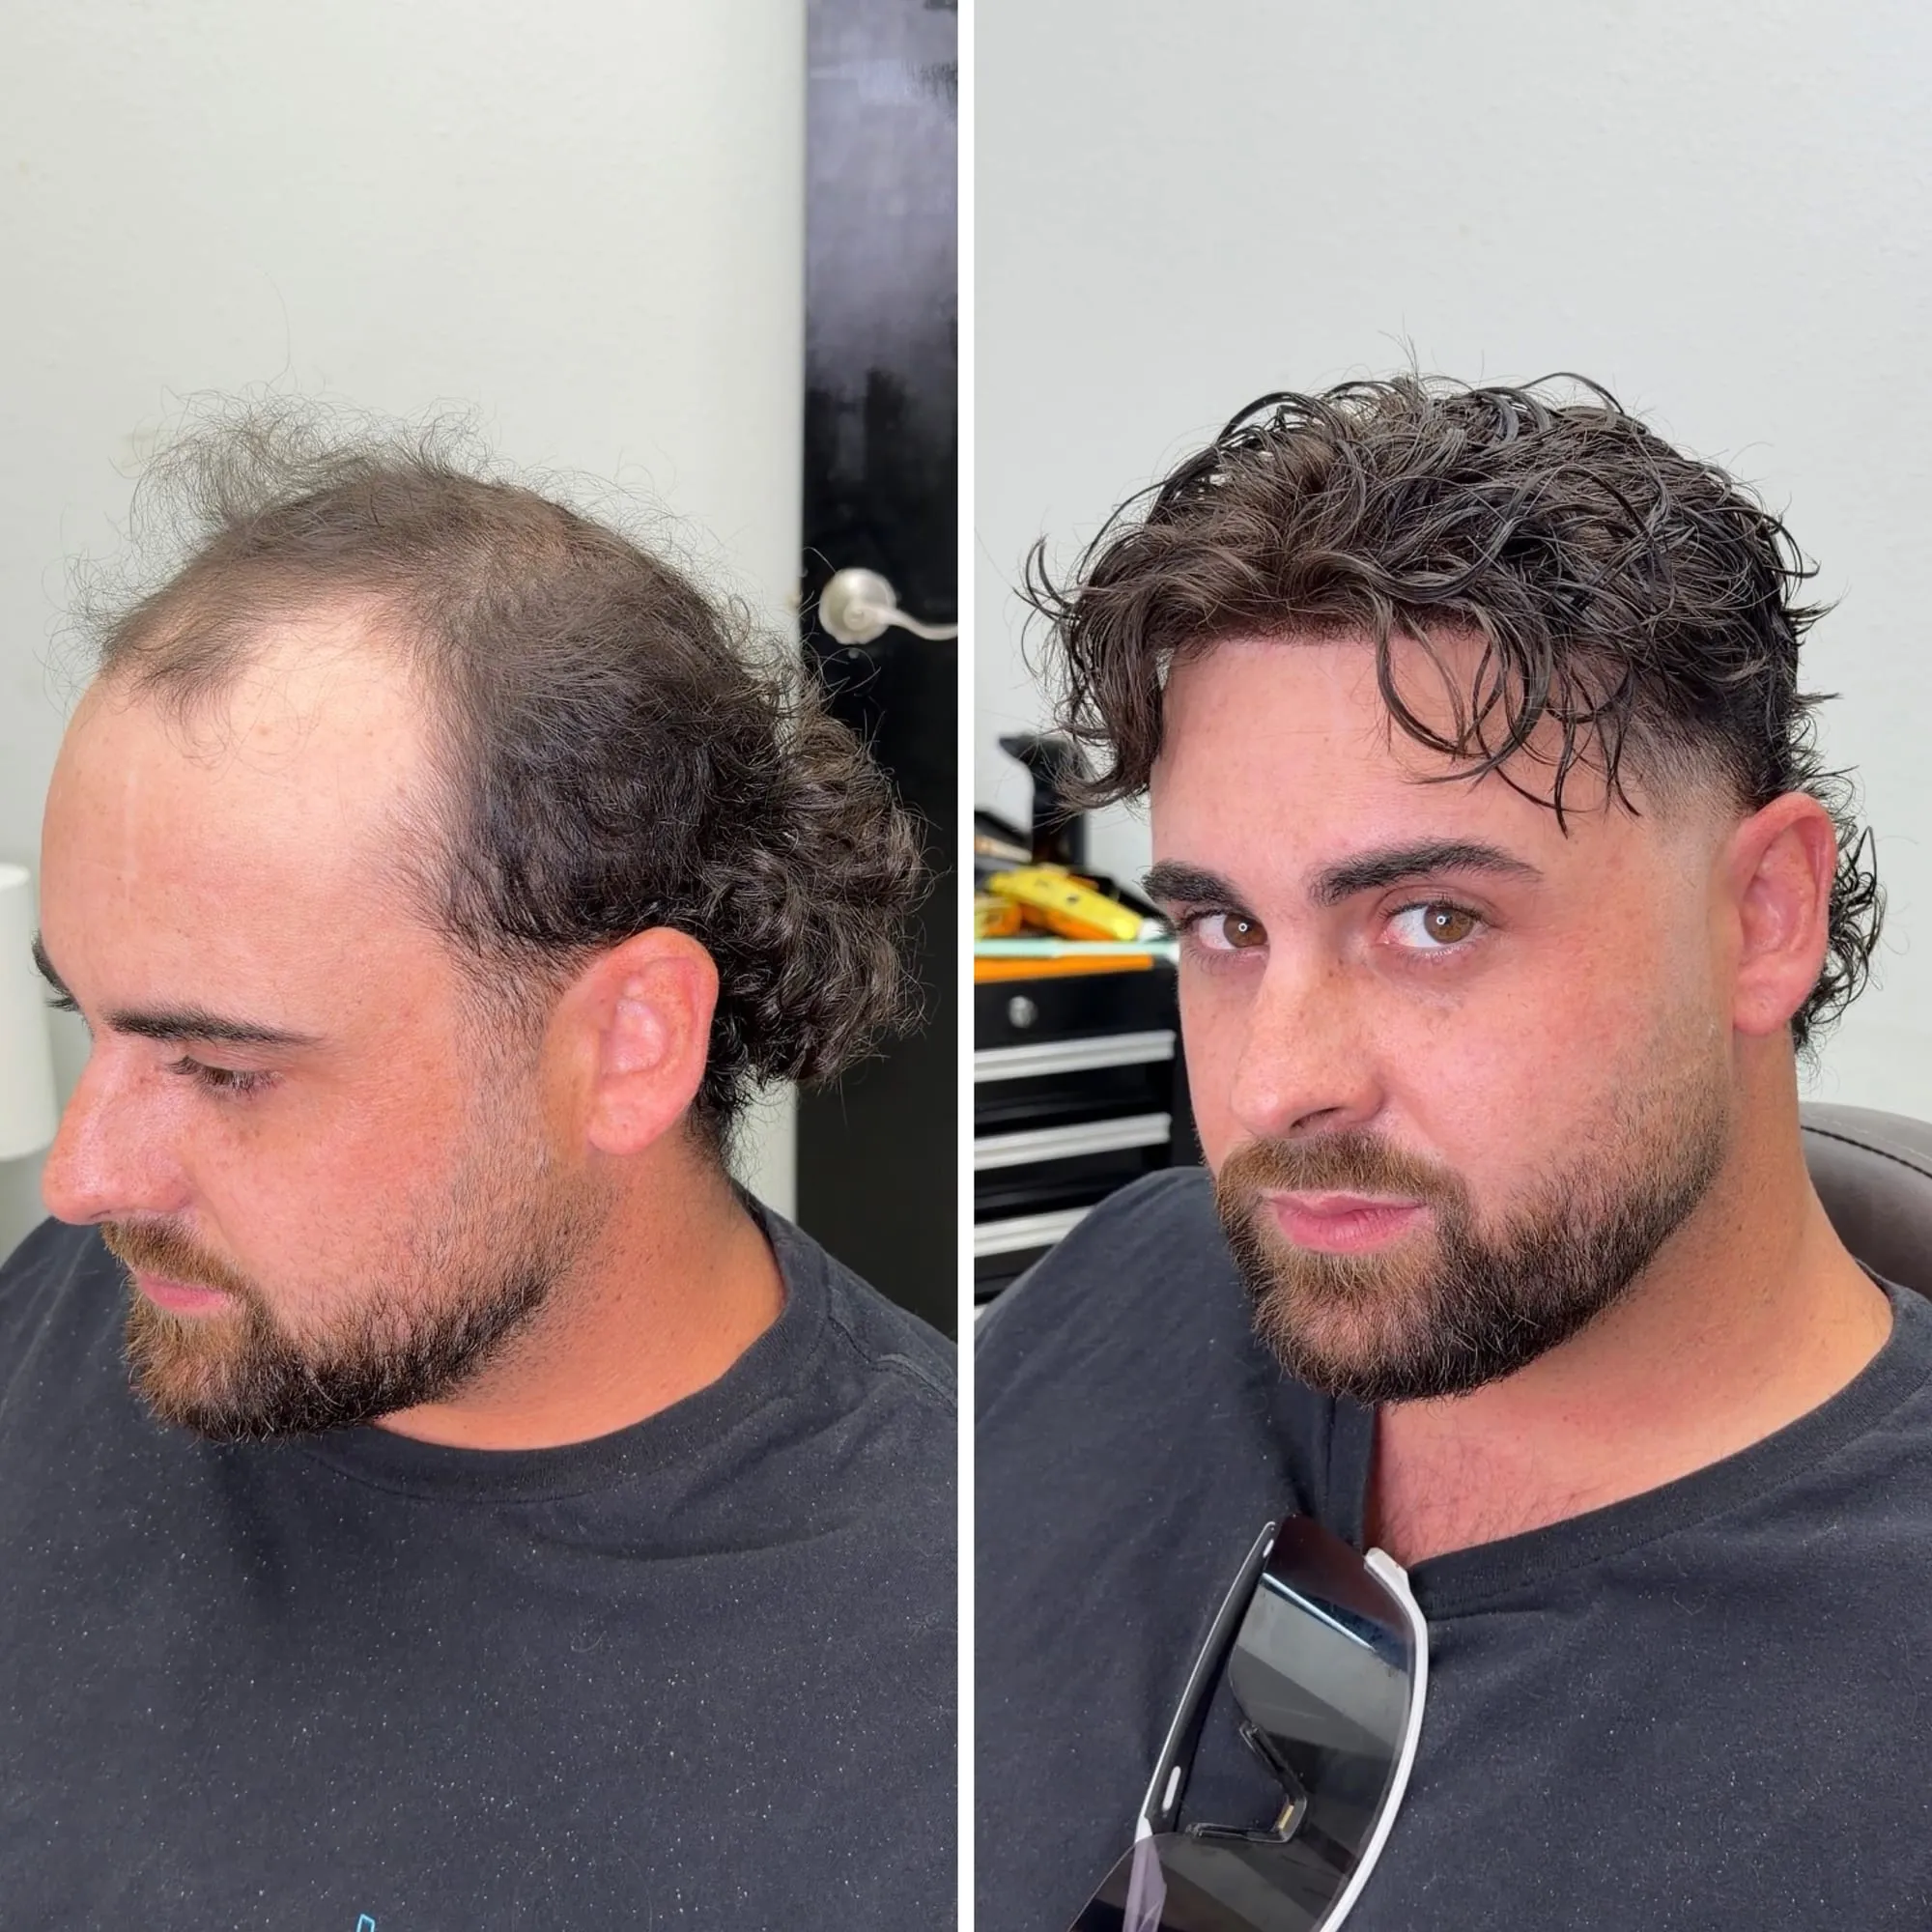
This is what it looks like.
A real client from our chair, photographed before and after his hair system was installed and cut in.
Questions, answered.
What tools do you need to install hair systems professionally?
Five stocked zones: a bonding station (adhesives and matched removers), a cutting and blending station (thinning shears, a razor, fine detail scissors), a prep and sanitation station, a templating and measurement station, and an aftercare retail shelf. The bonding and cutting zones are what you cannot open the chair without.
How is a professional kit different from an at-home wearer kit?
A wearer's kit only reattaches and cleans one unit they already own. A professional station has to cut in raw stock, blend a perimeter, bond, remove, prep skin, template for custom orders, and reset worn units, sometimes all in one appointment, so it is far broader and organized by zone.
Which zone should a new technician invest in first?
The bonding station. Hold and clean removal drive client comfort and your callback rate, so carry a soft-bond and a hard-bond option with a matched remover for each before you widen the rest of the kit. The templating and repair zones can come online later.
Do I need ventilating and templating tools right away?
Not on day one. Those are grow-into zones. Templating tools arrive when you start taking custom orders, and ventilating needles come in once you handle knot repairs in the chair rather than sending every unit out. Stock the must-have zones first.
How do I choose products without brand recommendations?
Judge each item by how it behaves, not by its label. Understand what each zone does, test any new product on yourself or a model first, and keep notes on how it holds and removes in your climate. That record outlasts any brand that reformulates or disappears.
Keep reading
Related guides.
Tools & Supplies
The categories of tools and supplies a hair system barber needs, and how to choose each one, with no brand endorsements and no prices.
Templating and Measurement
A vendor-neutral studio method for templating and measuring a client for a custom hair system, with a numbered process and a full measurement chart.
Add It to Your Shop
A shop owner playbook for adding hair replacement: menu placement, book blocking, private space, and converting the regulars already in your chairs.
How to Become a Hair Replacement Artist
The path from barber to hair replacement artist: the skills, the training, and how to add hair systems as a high margin service line.