

Last updated September 28, 2026
Templating versus measurement, and why a custom order needs both
A template is a physical mold of the exact area the hair system will sit on. It captures the shape of the perimeter, the curve of the scalp, and where the client wants the front hairline to fall. Measurements are the numbers that ride alongside it: circumference, length, and width across fixed landmarks. Neither one replaces the other. A template shows the vendor the shape, and the measurements let them sanity-check that shape and set base dimensions when the mold is trimmed or read at an angle.
This matters most on a fully custom order, where nothing is pulled from a stock size. A stock base can be sold on measurements alone because its shape is already fixed. A custom base is built to the mold, so the mold has to be right the first time. Get it wrong and the client wears a base that lifts at the temples, sits too far forward, or leaves a gap at the nape, and no amount of good cutting-in at the chair fully hides a base that was templated badly.
Framing this for the client is straightforward and honest. The template maps where the hair system will cover the appearance of thinning, it does not treat or change the scalp underneath. You are recording a shape, not making a promise about the hair the client still has. Keep that language clean, especially with clients who are anxious about loss, and defer anything medical to their physician or dermatologist.
Before you start: prep the scalp and the station
Templating is only as accurate as the surface you mold over, so the prep is not optional. A rushed scalp gives you a rushed template. Set up so the client is comfortable and still for the full process, because movement in the chair is one of the most common ways a mold ends up distorted.
- Seat the client upright with the head in a neutral, level position, not tilted down at a phone
- Clip or tape back any existing hair that falls inside the templating area so the film sits flat on skin
- Wipe the scalp clean and fully dry so tape and film adhere without slipping
- Have transparent film, clear tape, a fine permanent marker, and sharp scissors within reach before you begin
- Agree the front hairline placement with the client and mark it lightly on the skin first, before any film goes down
The step-by-step templating method
This is the sequence we use in the studio. Work slowly, check the client in the mirror at the hairline stage, and do not cut anything free until every line is marked. The whole method builds one accurate, reusable mold of the wearing area.
- 1. Confirm the perimeter. With the client, decide how far the unit extends at the front, sides, and back, and mark that boundary lightly on the scalp and on any bordering hair.
- 2. Lay the first film layer. Drape transparent film over the whole templating area and press it smooth against the scalp so it follows the true contour with no trapped air or wrinkles.
- 3. Anchor with tape. Cover the film with overlapping strips of clear tape, running them in two directions so the mold becomes a rigid shell that holds the scalp's shape once it is lifted.
- 4. Trace the front hairline. Mark the agreed hairline exactly where it will sit, noting whether it is a straight, receded, or widow's-peak shape, because this line drives how natural the final result reads.
- 5. Trace the full perimeter. Draw the complete outline of the wearing area onto the taped shell, front, temples, sides, and nape, following the boundary you set in step one.
- 6. Mark the part and hair direction. Draw the intended part location and use short arrows to show which way the hair should flow across the front, crown, and sides.
- 7. Note the crown and whorl. Mark where the crown swirl should sit so the vendor ventilates the growth pattern in the right place rather than a generic center.
- 8. Cut the mold free. Trim along the perimeter line, lift the shell off in one piece, and confirm it holds its curved shape without flattening.
- 9. Label everything. Write front, back, part side, and the client's name directly on the mold so nothing is guessed once it leaves your hands.
The measurements that travel with the template
The mold carries the shape, but a short set of standard head measurements travels with it so the vendor can verify base size and contour. These are the same landmarks the whole industry reads, which is what makes them portable between studios and vendors. Take them with a soft tape, keep light and consistent tension, and record how you took each one so anyone reading the order can reproduce it. No figures are printed below on purpose, because the numbers belong to one specific head and are recorded fresh at the appointment, not published as a blanket size.
| Measurement | Landmarks | How to take it | What it controls |
|---|---|---|---|
| Circumference | Around the full head at the widest point | Run the tape around the hairline and above the ears, level all the way around | Overall base size and how the perimeter is scaled |
| Front to back | Front hairline to the nape | Measure straight over the top of the head along the intended part line | Base length and where the crown falls |
| Ear to ear across the front | Temple to temple along the front hairline | Follow the hairline from one temple to the other | Front width and how far the hairline wraps at the temples |
| Ear to ear over the top | Top of one ear to the other, across the crown | Lay the tape over the highest part of the scalp between the ears | The arc and rise the base must curve to |
| Temple to temple around the back | Temple to temple following the rear perimeter | Trace the tape around the back edge of the wearing area | Rear width and how the base seats at the nape |
Marking the hairline, the part, and hair direction
The three marks that most decide whether a finished unit looks real are the front hairline, the part, and the hair direction, and all three are set at templating rather than fixed later. The hairline is the one clients notice, so agree it in the mirror and place it to suit the face and age rather than as low as possible. A natural hairline has a little irregularity and a soft front, and you can note that intent on the mold so the vendor does not ventilate a hard, straight wall of hair.
The part and the direction arrows tell the vendor how to angle every knot. If the client parts on the left, the hair across the front has to sweep from that part, and the crown has to swirl the correct way. Skipping these marks forces the vendor to default to a generic layout that rarely matches how the client actually wears their hair, which then shows up as cowlicks and flat spots that fight the styling at the chair.
Common templating mistakes to avoid
Most bad custom orders trace back to a handful of repeatable errors at the template stage, not to the vendor. Catching these before the mold leaves the studio saves a remake and protects the client's trust.
- Wrinkled or air-trapped film, which bakes a distortion into the shape the vendor builds to
- Too little tape, so the shell flattens and loses the scalp's true curve on the way to the vendor
- Placing the front hairline without the client watching in the mirror, then having to remake it
- Forgetting the part and direction arrows, which forces a generic knotting pattern
- Leaving the mold unlabeled, so front, back, and part side get guessed at the vendor
- Templating over unclipped hair, which lifts the film off the skin and enlarges the shape
- Stretching the tape while measuring, which reads a smaller head than the client actually has
Getting the template to the vendor, and what is set later
Once the mold is cut, labeled, and paired with the measurement set, it becomes the physical spec the vendor reads alongside the written order form. Send the two together and keep a copy of the measurements on file so a reorder can be checked against the original. If you order for the same client again, a good template is reusable as long as the wearing area has not changed, which shortens future orders and keeps the fit consistent.
The template settles the shape and the growth pattern. The rest of the build, base material, hair type and origin, density, curl, and color, is decided on the order form and confirmed with the client, and the final figure for the work is set at consultation against that full specification rather than quoted from a chart. Templating is the foundation the whole order stands on, so it earns the extra minutes it takes to do slowly and mark completely.
Real work
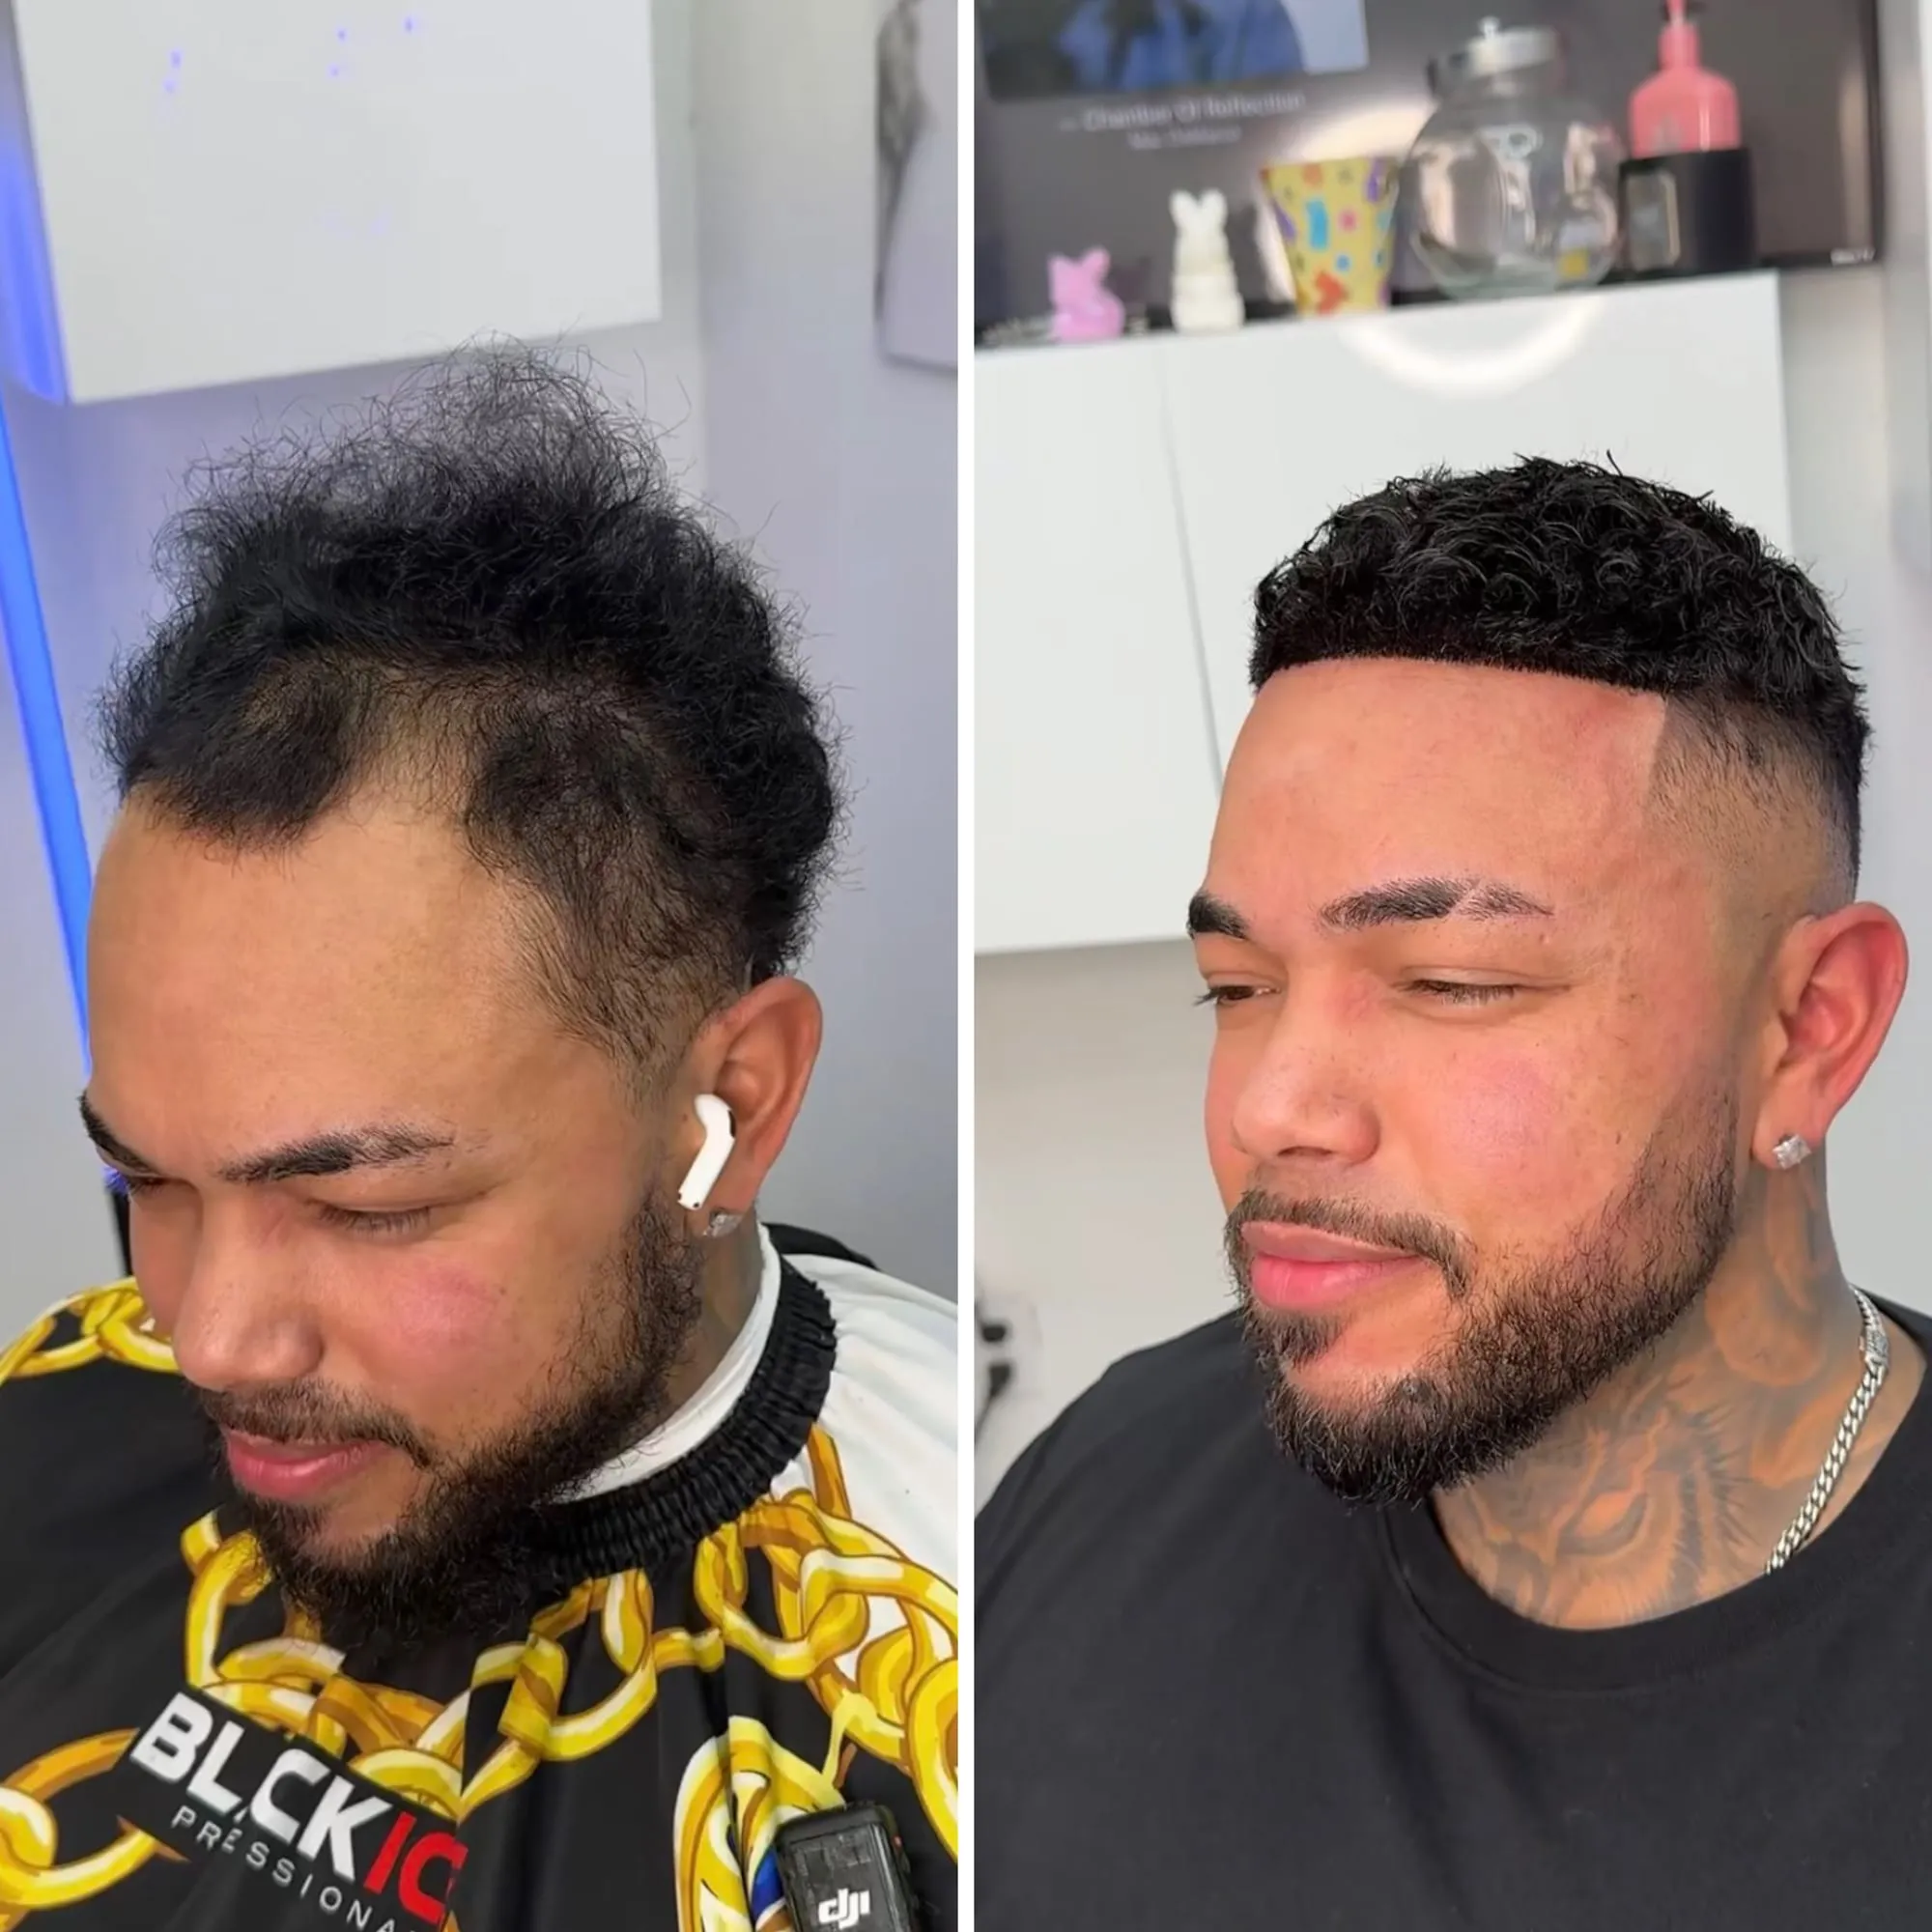
This is what it looks like.
A real client from our chair, photographed before and after his hair system was installed and cut in.
Questions, answered.
How do you make a template for a custom hair system?
Mold transparent film over the clean scalp, lock it rigid with overlapping clear tape, then trace the front hairline and the full perimeter and mark the part and hair direction before cutting the shell free. Label front, back, and part side, and pair it with the standard head measurements so the vendor builds to one exact head.
What is the difference between a template and measurements?
A template is a physical mold that captures the shape and contour of the wearing area, while measurements are the numbers taken across fixed landmarks. A custom base is built to the mold, and the measurements verify base size and contour. You need both for a custom order; a stock base can be sold on measurements alone.
Which measurements do you take for a hair system order?
The standard set is circumference, front to back, ear to ear across the front, ear to ear over the top, and temple to temple around the back. Take them with a soft tape at light, even tension, and record each client's own numbers rather than assuming a fixed size.
Why does the front hairline get marked at templating?
Because the hairline is the mark clients notice most, and it tells the vendor exactly where and in what shape to ventilate the front. Agreeing and marking it in the mirror at templating, with the intended irregularity noted, avoids a hard, unnatural front and a remake later.
Can a template be reused for a reorder?
Yes, as long as the wearing area has not changed. Keep the labeled mold and the measurement set on file, and a reorder can be checked against the original for a consistent fit, which shortens future orders for the same client.
Keep reading
Related guides.
Reading the Order Form
Every field on a custom hair system order form explained in one place: base size, material, density, color, grey, curl, length, origin, and more.
Tools & Supplies
The categories of tools and supplies a hair system barber needs, and how to choose each one, with no brand endorsements and no prices.
Hair System Barber
A hair system barber installs, cuts in, and maintains hair systems for men. Here is what the role involves and why barbers are adding it.
Pricing Framework
A pricing framework for barbers adding hair replacement: the factors that set install and maintenance fees, and how to build a menu that holds.