

Last updated September 28, 2026
Mistake one: an inaccurate template
The template is the whole job. If the mold of the scalp is wrong, the unit is wrong before it is ever made, and no amount of skill at the chair will save an install built on a bad measurement. Beginners rush this step because it feels like admin before the real work. It is the real work.
A template that is loose, stretched, or taken over stray hair instead of clean scalp hands the factory a shape that does not exist. The base comes back too big, sits proud at the edges, and lifts early. You cannot cut your way out of a base that was measured wrong.
- Template on clean, prepped scalp, never over stray hairs or product
- Mark the exact hairline, recession points, and crown before you mold
- Keep tension even so the base does not return stretched or undersized
- Photograph the marked template so the order matches the actual head
Mistake two: a hairline placed too far forward
New technicians want to give the client a full head of hair, so they set the hairline where the client's hair used to be rather than where it should sit now. A hairline dropped too low is the single fastest way to make an install read as artificial from across a room. Age, face shape, and how the client actually parts and styles all decide where the front should land.
A believable front sits slightly back from the client's memory of it, follows the natural curve of the temples, and never runs as a hard straight line. When in doubt, place it higher. You can always bring a hairline down at the next service. You cannot move it back without the client noticing the change.
- Set the front from the face and age, not from old photos
- Follow the temple curve and avoid a flat, ruler-straight edge
- Leave a soft, irregular front rather than a dense block
- Err higher on the first install, since a lower line is hard to undo
Mistake three: too much adhesive
More glue does not mean more hold. It means a slower cure, a mess at the perimeter, a shine that catches the light, and a bond that is harder on both the base and the client's skin when it comes off. Beginners overapply because they are afraid of lift, then create the exact edge problems they were trying to prevent.
Hold comes from clean skin, the right product for that client, a thin even coat, and proper dry or tack time. It does not come from volume. A controlled thin application disappears at the hairline and lasts the full wear window. If a client reports ongoing skin irritation from an adhesive, that is a conversation for their physician, not a reason to keep switching products blindly.
- Apply thin, even coats and respect the product's tack time
- Match the adhesive to the client's skin, sweat, and routine, not habit
- Keep product off the hair and just inside the perimeter, never over it
- Refer persistent skin reactions to the client's physician or dermatologist
Mistake four: skipping scalp prep
Prep is boring, so beginners skimp on it, then blame the adhesive when the bond fails on day three. Oil, dead skin, and old product residue are what a bond actually fails against. A scalp that is not clean and fully dry will lift no matter how good the unit or the glue.
Good prep is a short, repeatable routine every single time. Clean the area, remove residue, let the skin dry completely, and only then start the bond. This is also where you protect the client's comfort, because a well-prepped scalp holds cleaner and comes off easier at the next visit.
- Clean and de-oil the bonding area every time, no exceptions
- Remove all old adhesive residue before laying anything new
- Let the skin dry completely, since a damp scalp will not hold
- Build prep into your process as a fixed step, not an optional one
Mistake five: a rushed removal
The install gets all the attention, so removal is where beginners hurry, and hurrying is where the damage happens. Lifting a bonded base off dry tears at the base, stresses the knots, and can irritate the client's skin. A unit that should last months gets shortened by a few minutes of impatience.
Removal is a solvent-and-patience job. Let the remover do the work, lift slowly and evenly, and never peel against resistance. Protecting the unit at removal protects the client's investment and your own reputation, because a base you tear is a base you have to replace early.
- Use the correct remover and give it time to break the bond
- Lift slowly and evenly, and never pull against a base that resists
- Protect the knots and lace edge, which give out first when rushed
- Treat removal as part of the service, not a quick afterthought
A quick check before every install
Most beginner mistakes disappear when you slow down at four moments: the template, the hairline, the bond, and the removal. Run a short mental checklist at each one and you avoid almost everything on this page.
- Is my template on clean scalp with the hairline marked exactly?
- Is the front set back enough to read as natural, not dropped too low?
- Is my adhesive thin, matched to this client, and fully cured before I trust it?
- Am I giving removal the time and solvent it needs to protect the base?
Real work
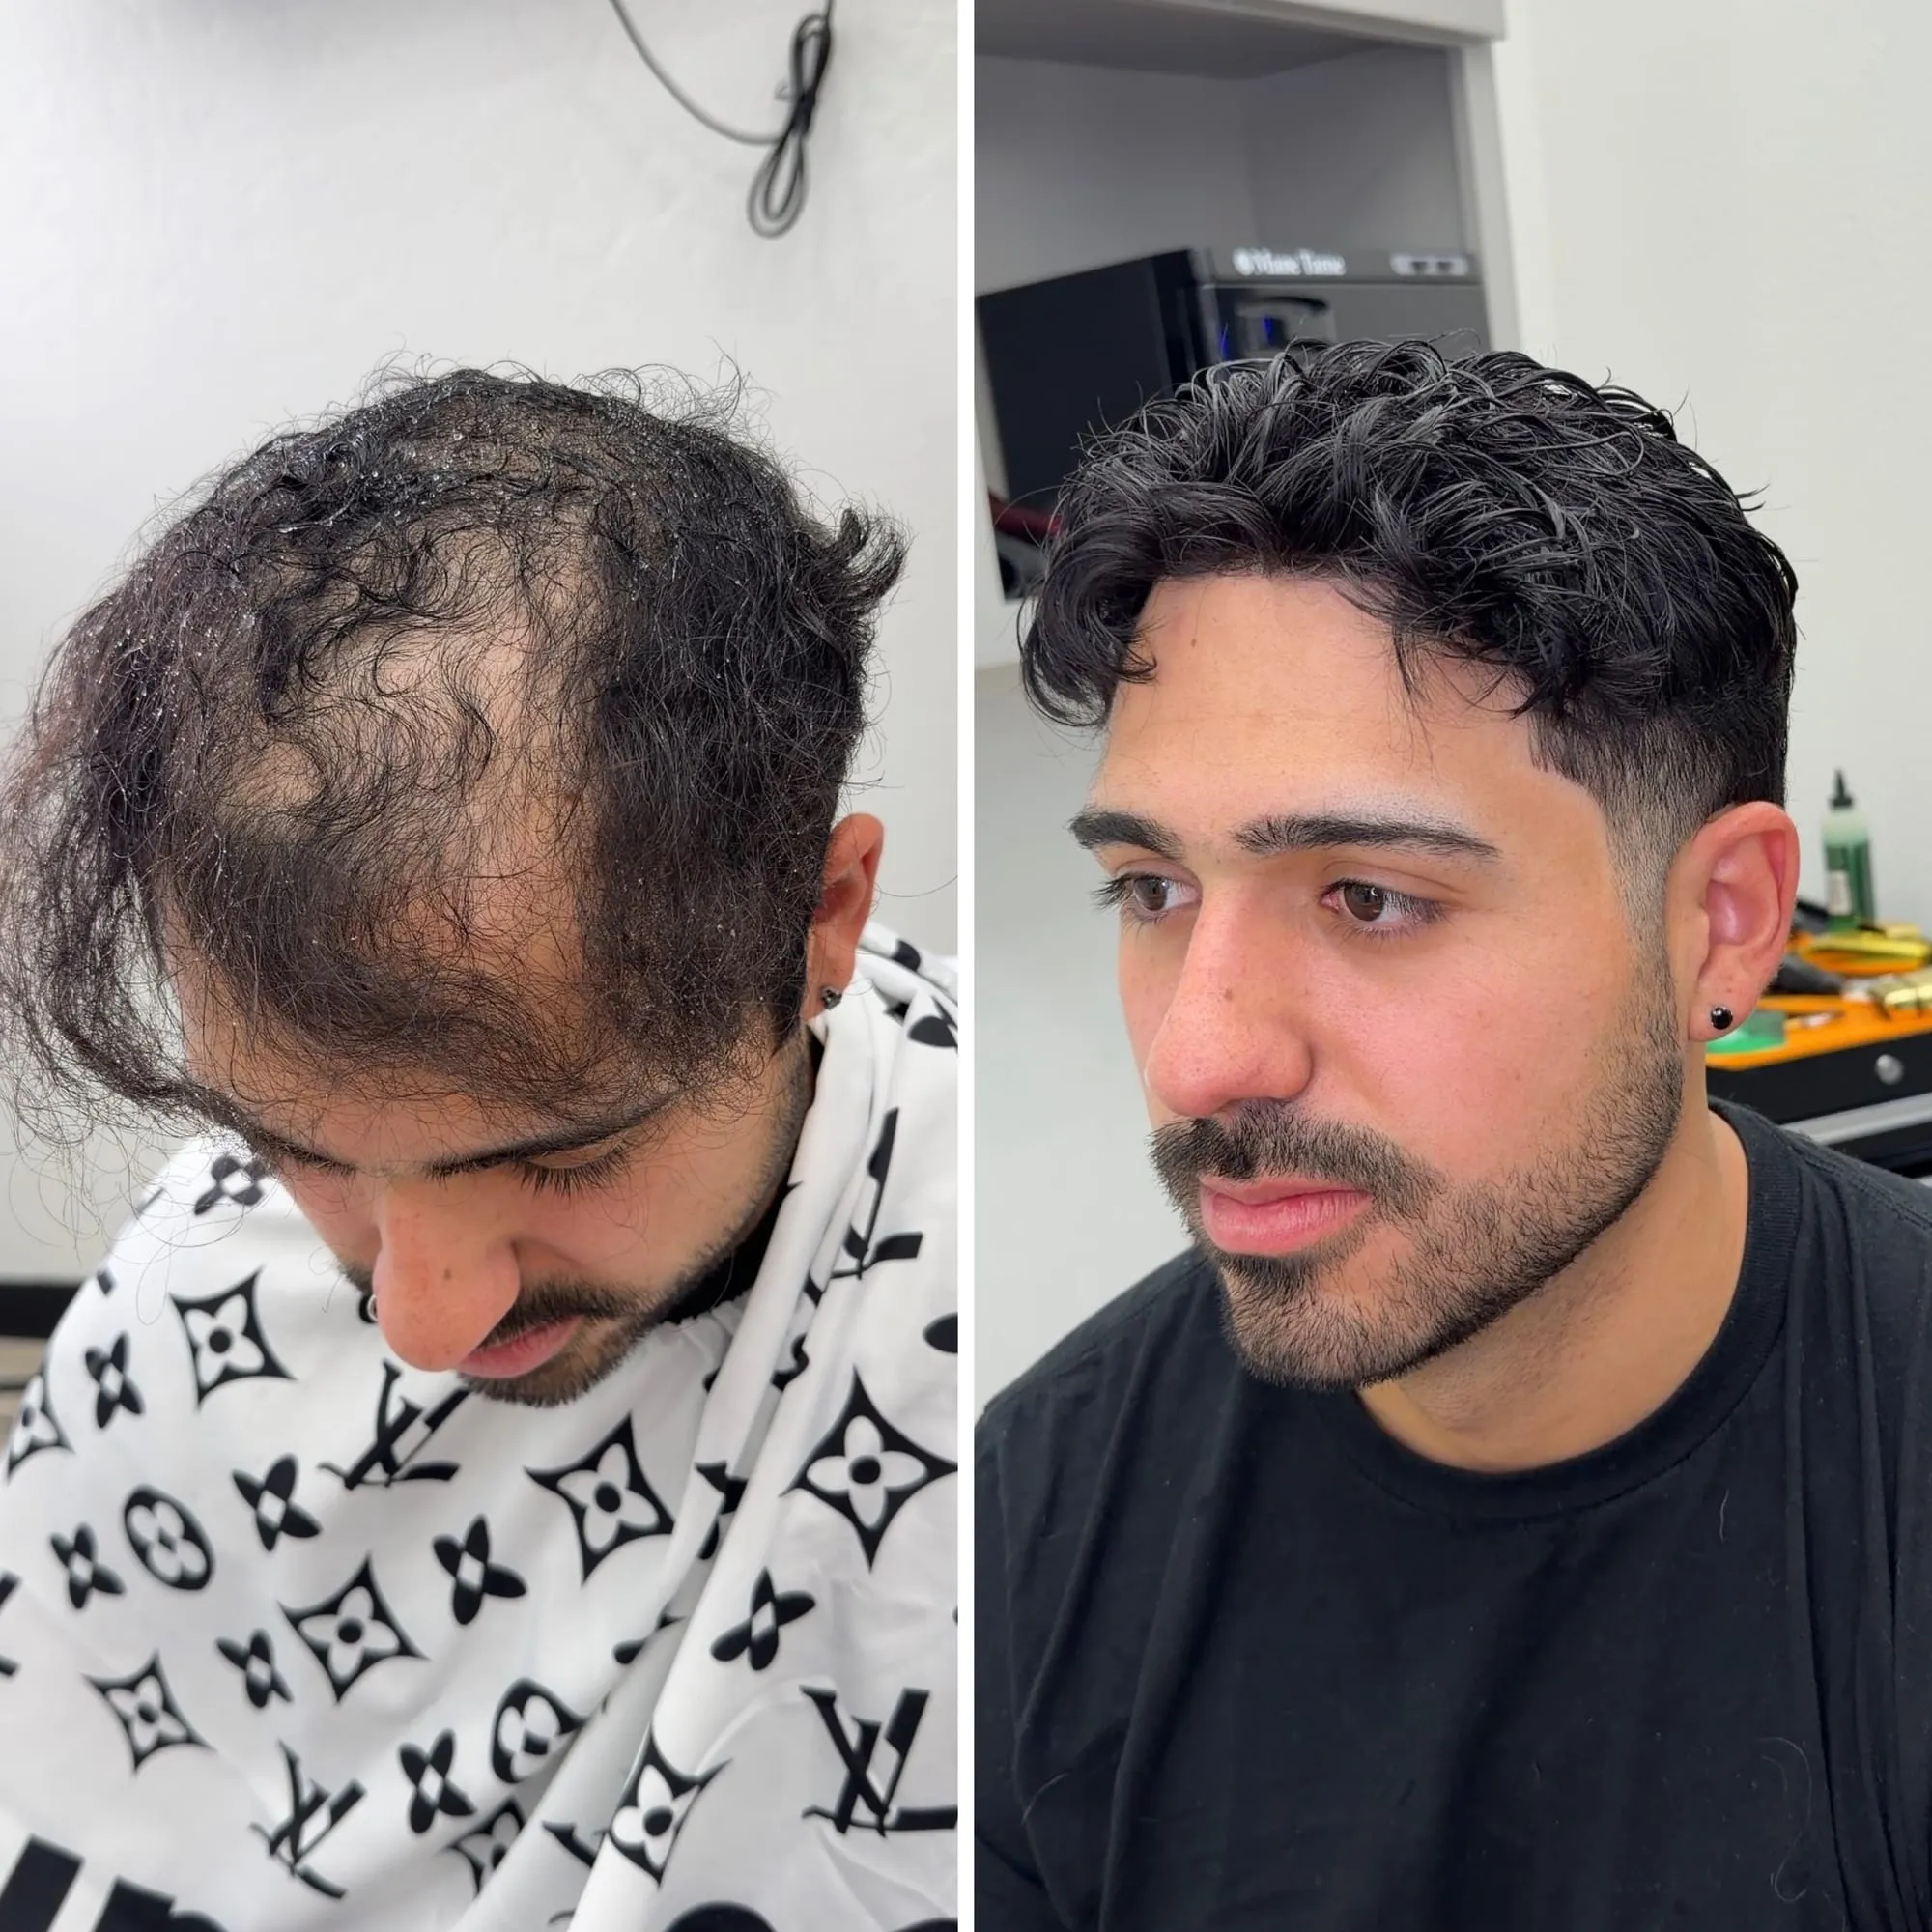
This is what it looks like.
A real client from our chair, photographed before and after his hair system was installed and cut in.
Questions, answered.
What is the single most common beginner mistake?
Placing the hairline too far forward. New technicians set the front where the client's hair used to be instead of where it should sit now, and a low, dense, straight hairline is the fastest way to make an otherwise good install look artificial. Err higher and refine at the next service.
Why do my installs keep lifting at the edges?
Almost always it is prep or adhesive volume, not the unit. A scalp that is not fully cleaned and dried will not hold, and overapplying adhesive slows the cure and messes the perimeter. Clean, de-oil, dry completely, then apply a thin even coat and respect the tack time.
How do I fix a template that keeps coming back wrong?
Slow down and template on clean, prepped scalp with even tension, marking the hairline, recession, and crown before you mold. Most bad bases trace back to templating over stray hairs or stretching the material. Photograph your marked template so the order matches the actual head.
How can beginners practice without risking a real client?
Train on a real head under supervision before you take money, and treat your first installs as supervised reps. Structured training and mentorship let an experienced technician catch these mistakes before they become habits. That is the whole reason we push hands-on certification over learning from clips alone.
Keep reading
Related guides.
Training
What hair replacement training for barbers covers, how classroom and mentorship fit together, and how to choose a program that builds a paying service.
Templating and Measurement
A vendor-neutral studio method for templating and measuring a client for a custom hair system, with a numbered process and a full measurement chart.
How to Become a Hair Replacement Artist
The path from barber to hair replacement artist: the skills, the training, and how to add hair systems as a high margin service line.
Start a Business
The real steps to add hair replacement to a barber business: training, first clients, pricing, and building recurring maintenance revenue.