

Last updated September 28, 2026
What you are actually measuring
The base is the sheer foundation your hair is knotted into, and it has to match the area you want to cover before it can bond cleanly to your scalp. Measuring for a hair system means mapping that area with two primary numbers, a length and a width, plus a note on the shape of your front hairline. Get those right and the base sits flat with no lifting at the edges and no wasted material past the thinning zone.
Most off the shelf bases are cut to standard rectangles, and the most common stock size is 8 inches by 10 inches, trimmed down to your outline at the fitting. Your own measurements tell us whether a stock size will work once it is cut in, or whether the area calls for a custom base built from a mold of your head. Either way the numbers come first.
What you need before you start
Tools matter here. A rigid metal tape or a wooden ruler cannot follow the curve of your skull, so it will read short and the base will come back too small. Use a soft tape and take your time.
- A flexible fabric tape, the kind used for sewing and tailoring, marked in inches
- A mirror, or better, a second person to read the tape at the back and crown
- A pen and paper to write down each of the three readings as you go
- A comb and a little water to flatten your existing hair so the tape lies against the scalp, not on top of loose strands
The step by step method
Work through these in order. If your hands are steady and someone is helping you read the crown, the whole process takes about five minutes.
- 1. Comb your hair flat and slightly damp so the tape can sit close to the scalp across the whole area.
- 2. Length: place the zero end of the tape at your front hairline in the center, then run it straight back across the top of the crown to the point where you want coverage to end. Read the number where the tape meets that back point.
- 3. Width: measure temple to temple across the top of your head, but start about one inch behind each temple point rather than at the temple itself, because that is where a natural hairline actually sits. Read the widest number the area needs.
- 4. Keep the tape snug and flat against your head for both readings. No kinks, no slack loops, and no pulling it tight enough to dent the skin, which reads short.
- 5. Mark the outline: if you can, use a washable pen or have your helper trace the edge of the thinning area so you can see the true shape, not just two straight lines.
- 6. Note the front contour, meaning whether your hairline runs nearly straight across, curves gently, or dips in a deeper arc. This shape matters as much as the two numbers.
- 7. Measure everything three times. Write down each reading. If the three agree within a small margin, use them. If one is off, you moved the tape or changed tension, so take that dimension again until the numbers settle.
The numbers at a glance
This table sums up the readings that go on an order, the typical ranges we see, and why each one earns its place. Treat the ranges as a guide, not a target: your head decides the real figures.
| Measurement | Where to start and stop | Typical range |
|---|---|---|
| Length | Front hairline center, straight back across the crown to where coverage ends | 8 to 10 inches for full top coverage |
| Width | Temple to temple, starting about one inch behind each temple point | 5.5 to 7 inches across the top |
| Common stock base | The most widely stocked off the shelf rectangle, cut down at fitting | 8 by 10 inches |
| Coverage margin | Extra past the edge of the thin area so the base blends into growing hair | 0.5 to 1 inch beyond the loss |
| Front contour | The shape of the hairline edge, not a distance | Straight, gentle curve, or deeper arc |
Common mistakes that throw the numbers off
Almost every bad measurement comes from one of a handful of habits, and all of them are easy to avoid once you know them.
Pulling the tape too tight is the most common. A snug tape follows the scalp, a tight one compresses the skin and reads short, which gives you a base that lifts at the edges. Measuring over unflattened hair does the opposite, adding bulk under the tape so the reading runs long. Starting the width at the temple point instead of one inch behind it pushes the hairline too far forward and looks unnatural. And skipping the third reading is how a single slip becomes an order you cannot use. Three measurements that agree are your proof the numbers are honest.
Stock size versus a custom template
Your measurements decide which path fits. If the area falls near a standard rectangle, a stock base cut down to your outline is the fast route, and the numbers above are enough to choose one. If your loss pattern is irregular, spans a large area, or you want the closest possible fit, a custom base built from a template or mold of your head is the honest answer.
A template is a thin film pressed and taped over the exact area so the shape, the contour, and the curve of your skull are all captured at once. It removes the guesswork that two tape numbers leave behind. When you weigh the options, keep the cost drivers in view so nothing surprises you, ranked here from the one that moves cost most to least, with the exact figure confirmed at your consultation:
- A fully custom base built from a template or mold, rather than a cut down stock size
- Length over six inches, which takes more hair and more knotting time
- European hair, which is scarcer than other origins for the same length and density
- Specialty base features such as a silk top, which add construction steps beyond a plain measurement
When to let us measure for you
You can absolutely take these numbers at home, and they are useful for a first conversation or a virtual consultation. But a base is only as good as the outline behind the two numbers, and that is where a trained eye helps. At our studios in Peoria, Arizona and Eighty Four, Pennsylvania, Nico Rigano, Ivette Rigano, and Denisse Diaz measure the length and width, then map your contour and the true edge of the thinning area by hand and, when it matters, take a template.
If you are ordering your first unit, we would rather confirm your readings in person or on a guided video call than have you commit to a base built on a number that moved. Bring your at home measurements, and we will check them against your head, talk through stock versus custom, and read the front contour together so the hairline lands where it should.
Real work
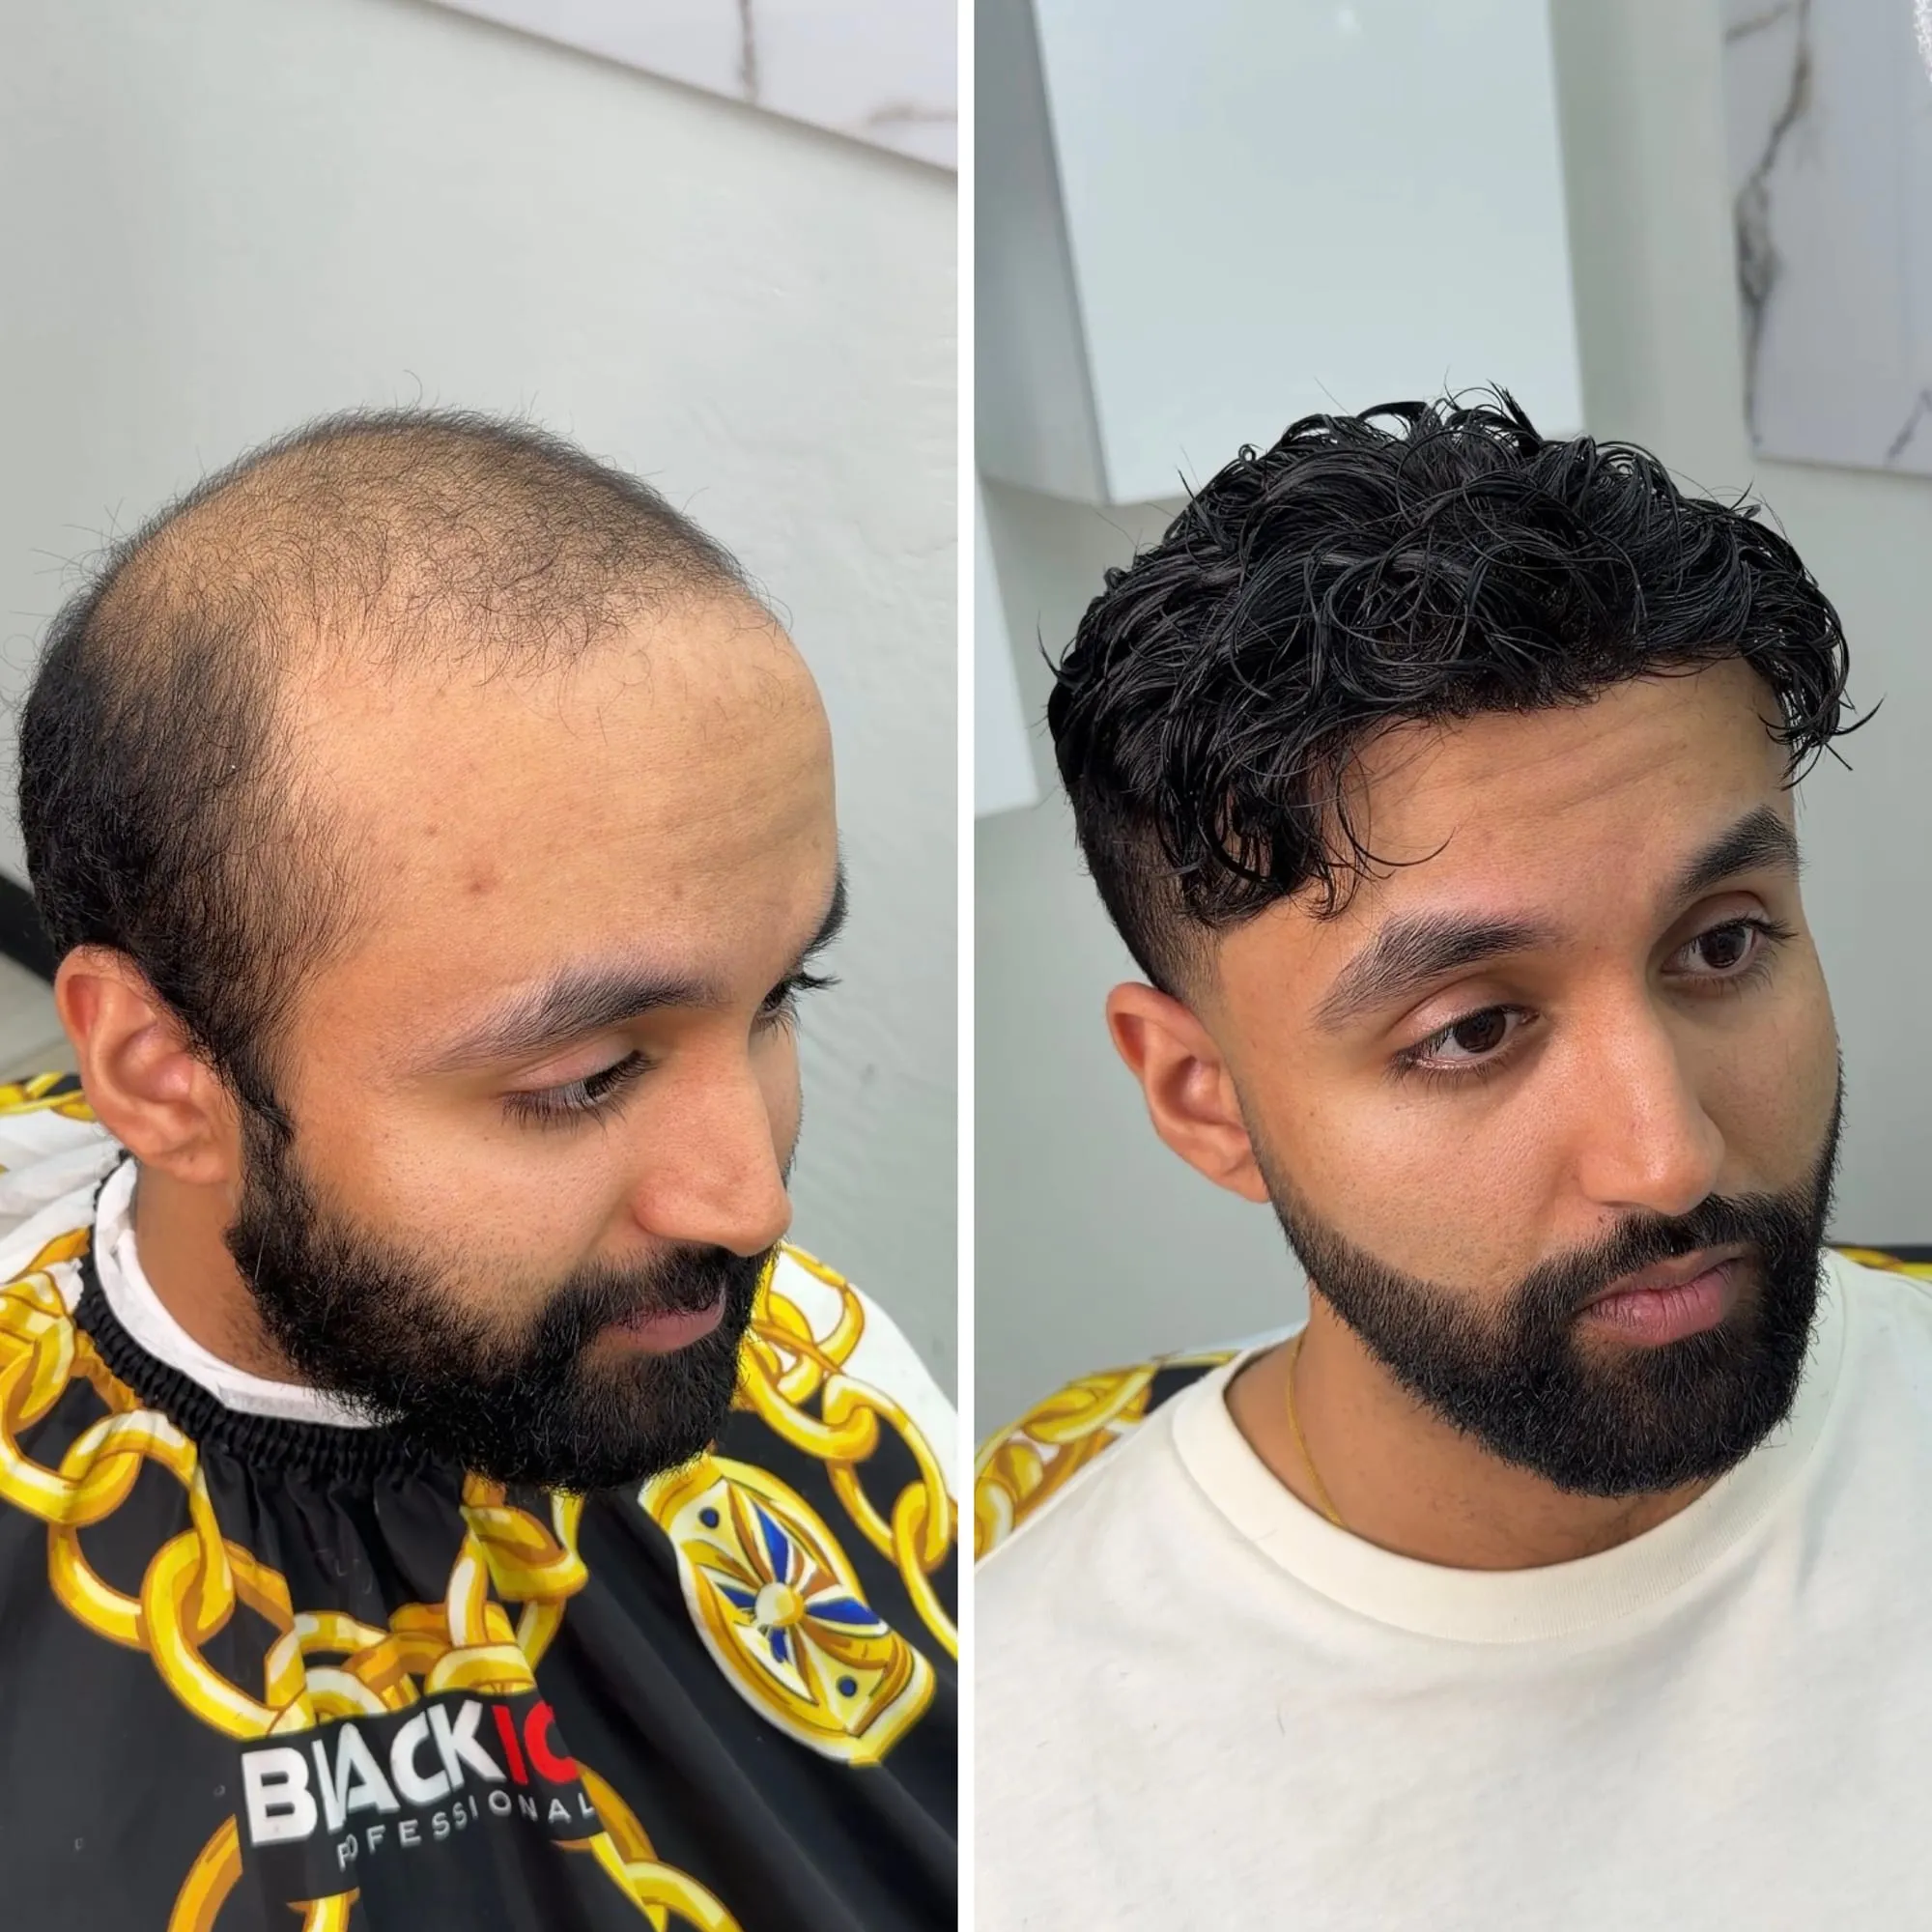
This is what it looks like.
A real client from our chair, photographed before and after his hair system was installed and cut in.
Questions, answered.
What tape should I use to measure for a hair system?
A flexible fabric tape, the kind used for sewing, marked in inches. A rigid metal tape or a ruler cannot follow the curve of your skull, so it reads short and the base comes back too small. Keep the fabric tape snug and flat against the scalp with no kinks.
How do I measure the length and width?
Length runs from your front hairline in the center straight back across the crown to where you want coverage to end. Width runs temple to temple, but start about one inch behind each temple point rather than at the temple itself, because that is where a natural hairline sits.
Why measure three times?
Small changes in tape tension or placement shift the reading enough to matter. Taking each dimension three times and confirming the numbers agree is your proof the measurement is honest. If one reading is off, you moved the tape, so take that dimension again until the numbers settle.
What is the most common stock base size?
The most widely stocked off the shelf base is 8 inches by 10 inches, which is cut down to your outline at the fitting. Your own length and width tell us whether a stock size will work once it is trimmed in or whether a custom base built from a template is the better fit.
Do I need a template instead of tape measurements?
Tape numbers are enough for a standard area near a stock size. If your loss pattern is irregular, spans a large area, or you want the closest possible fit, a custom base built from a template or mold captures the shape, the contour, and the curve of your head at once. We take one in studio when it matters.
Keep reading
Related guides.
Reading the Order Form
Every field on a custom hair system order form explained in one place: base size, material, density, color, grey, curl, length, origin, and more.
Base Size Chart
Standard hair system base sizes are small 6 by 8, medium 7 by 9, and large 8 by 10 inches, with 8 by 10 the stock default.
Stock vs Custom
Stock hair systems are ready made and fast. Custom units are built to your head, color, and hairline. Here is how the two differ and when each makes sense.
The Hairline
A natural hair system hairline is built from irregularity, a soft density gradient, and careful placement. Here is how we design one that reads as yours.