

Last updated September 28, 2026
Why the cut-in is the skill barbers search for
A stock unit arrives long, dense, and blunt. It has to look that way in the box so it can be cut down to any client. The result the client actually wants lives entirely in the cut-in. This is the step that separates a service someone will pay to keep from a result that gets shaved off after a week.
If you already cut hair, you are closer to this than you think. Point cutting, over-direction, thinning shears, razor work, blending a fade into longer hair on top: those are the same motions. What changes is the surface. You are working on ventilated hair anchored to a base, not hair growing from a scalp, so it does not grow back and it will not hide a mistake. You cut less, check more, and treat every pass as permanent.
Set up before you touch a blade
The cut-in happens with the unit attached and the client sitting normally, because you are cutting to their real head shape, posture, and the hair they still grow. Cutting a unit off the head or on a block gives you a shape that collapses the moment it is worn. Get the attachment solid, get the client upright, and get your light right first.
Dry cutting is where the finished shape is judged, but a light damp helps you control flyaways while you remove bulk. Have your full kit staged so you are not hunting for a tool mid-pass and leaving a section over-cut while you look.
- Unit fully attached, client seated upright at natural posture
- Even, honest lighting so density and shine read true
- Cutting shears, thinning or blending shears, and a razor staged
- A reference photo of the target so you cut to a plan, not a mood
Work front to back, top down
Establish the length and the weight line on the top first, then work back and down into the crown and sides. The top sets the reference everything else blends to. Take the shipped length off in stages rather than one committing cut, and step back between passes to read it from the front and both profiles the way the client and everyone else will see it.
Over-direction is your friend here. Pulling sections forward or up as you cut builds soft internal layers that let the hair fall and move instead of sitting like a helmet. Point cut into the ends rather than cutting straight across, because a blunt line on a unit looks like a unit.
- Take length in stages, reassessing from the front between passes
- Point cut the ends so nothing reads as a blunt factory line
- Over-direct to build internal layers and natural fall
- Read every stage from the front and both profiles, not just the top
Take the density down to real
Stock units carry more hair than a real head, so removing bulk is most of the believability. Thinning shears and careful razor work pull density out from the mid-lengths and underneath so the top surface stays intact while the weight underneath comes down. Thin in stages and comb through often, because thinning shears keep taking hair on every pass and it is easy to go past the point of return.
Density has to taper, not drop off a cliff. The perimeter and the parts of the unit that sit over areas where the client is thinner should be lighter than the core, so the eye never lands on a hard edge of hair. Where the client still grows their own hair at the sides and back, the unit density has to meet it, not overpower it.
Break the hairline so it reads as skin
The hairline is where the whole result is won or lost, and a solid line of hair at the very front is the single biggest giveaway. The front has to be irregular and soft: a broken, slightly uneven edge with the finest hair leading, exactly the way a real hairline is never a straight ruled line. This is the most conservative cutting on the whole head, done a few hairs at a time.
Work with a razor or the very tips of your shears to stagger the front, leave some hairs shorter and finer than others, and let the density build gradually back from the edge rather than starting full. On lace and thin skin fronts you are also cutting so the base sits flat and disappears against the forehead. Cut this slowly, because there is no undo and no regrowth.
Blend into the client's own hair
Most clients still grow hair at the sides and back, and the join between unit and growing hair is the seam you have to erase. Blend the two densities and lengths so they flow into one line with no shelf or step where the perimeter of the unit meets the natural hair below it. This is the same skill as blending a longer top into shorter sides, done across a boundary between two separate heads of hair.
Cross-check the blend by combing the unit hair and the natural hair together and looking for any point where the eye catches a change in density, direction, or length. Where they still grow enough to matter, the sides and back get cut as one continuous head, not as a unit sitting on top of a haircut.
- Match density first, then length, then direction across the seam
- Comb unit and natural hair together to find where the eye catches
- Erase any shelf where the perimeter meets growing hair
- Cut the sides and back as one head, not two layers
Finish, then plan the re-cut
Finish the way you finish any cut: detail the perimeter, refine the movement, and style it the way the client will wear it so both of you judge the real result and not a wet shape. Then show them the back and the profiles, because trust is built by letting them see what everyone else sees.
The cut-in is not a one-time job. As the unit is worn and the client grows their own hair, the blend drifts and the hairline needs refreshing, so the re-cut becomes part of every maintenance visit. Building the cut-in into your maintenance cadence is what keeps the result honest over months and what keeps the client in your chair.
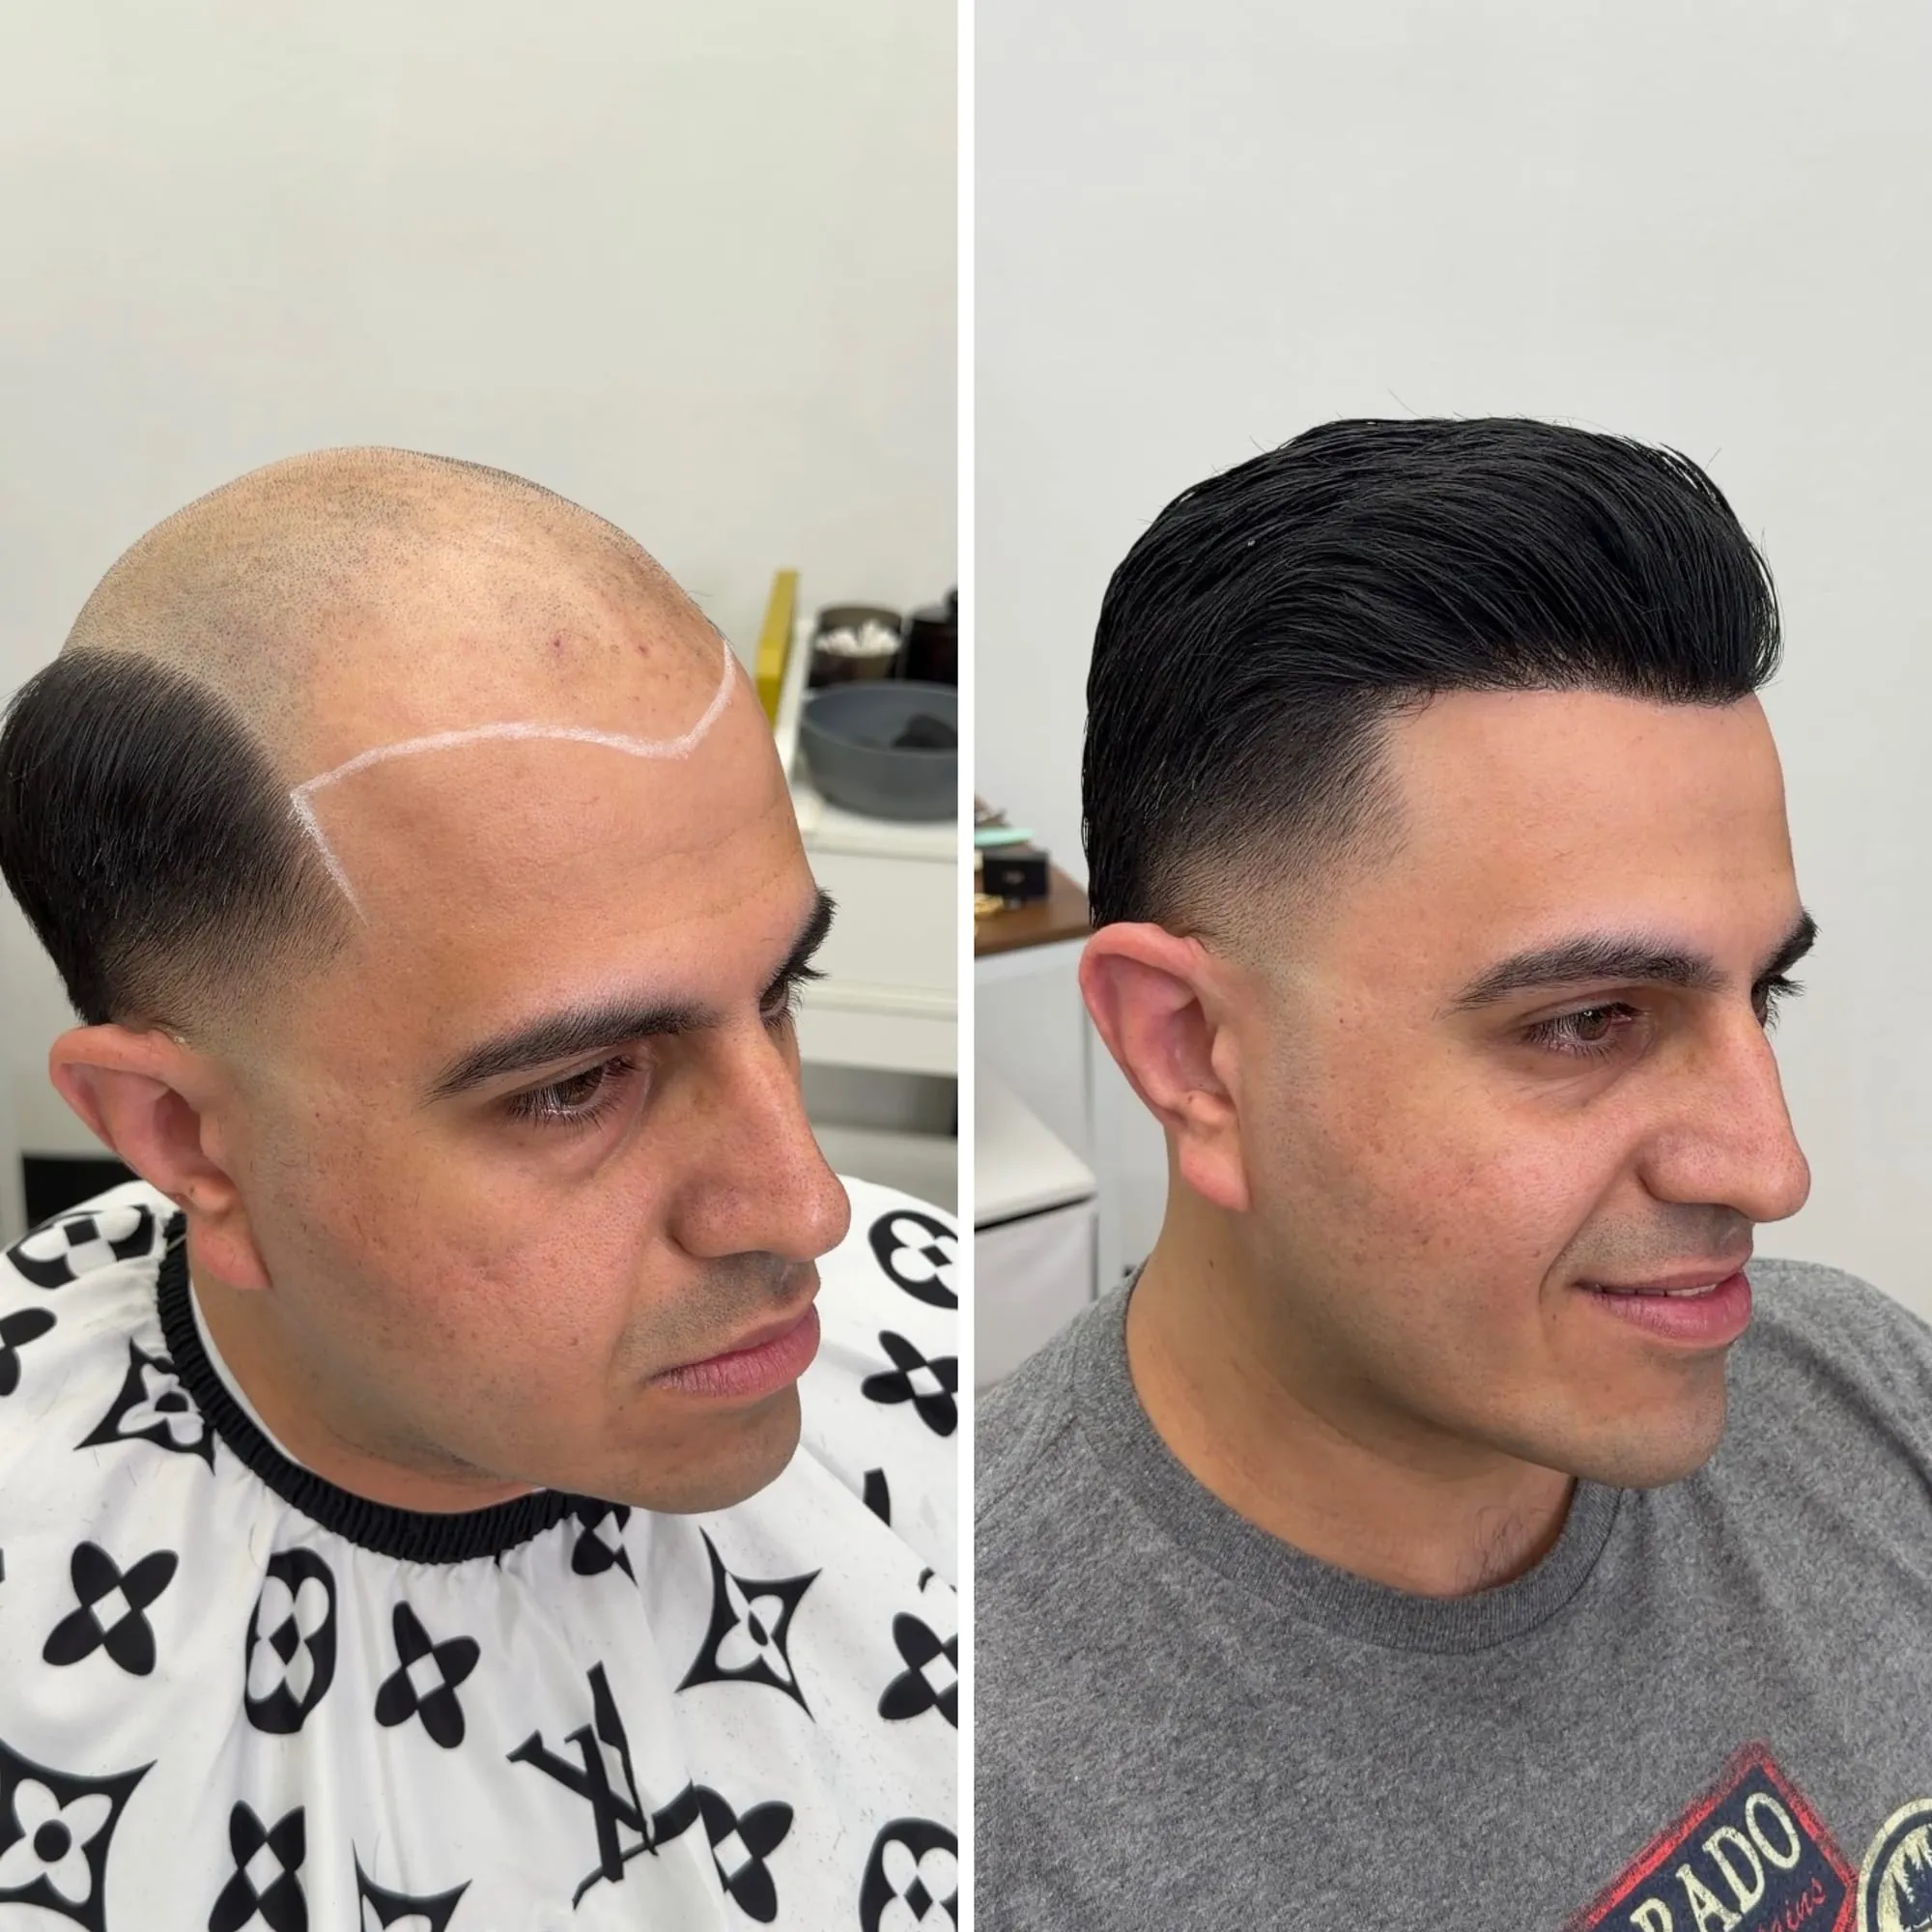
Real work
This is what it looks like.
A real client from our chair, photographed before and after his hair system was installed and cut in.
Questions, answered.
Do I cut the unit before or after attaching it?
After. The cut-in is done with the unit attached and the client seated upright, so you are shaping to their real head, posture, and the hair they still grow. Cutting on a block gives you a shape that falls apart the moment it is worn.
How is this different from a normal haircut?
The motions are familiar, but the surface does not grow back and will not hide a mistake, so you cut less and check more. You are also joining a ventilated unit to the client's own growing hair into one seamless line, rather than cutting a single growing head.
What is the hardest part to learn?
The hairline. Breaking the front so it reads as soft, irregular skin instead of a solid wall of hair is the most conservative and least forgiving cutting on the whole head, and it is the detail that gives a unit away fastest. It is best learned on a real head under someone experienced.
Can I teach myself the cut-in from videos?
You can learn the shape of it, but there is no undo on a unit, so unsupervised practice on a paying client is how barbers build a bad reputation early. Structured training on a live head plus mentorship on your first cut-ins compresses the learning curve and protects your clients.
Keep reading
Related guides.
Hair System Barber
A hair system barber installs, cuts in, and maintains hair systems for men. Here is what the role involves and why barbers are adding it.
Tools & Supplies
The categories of tools and supplies a hair system barber needs, and how to choose each one, with no brand endorsements and no prices.
How to Become a Hair Replacement Artist
The path from barber to hair replacement artist: the skills, the training, and how to add hair systems as a high margin service line.
Training
What hair replacement training for barbers covers, how classroom and mentorship fit together, and how to choose a program that builds a paying service.